Doom The Dark Ages packs the biggest weapon stash in the series, all styled to fit its medieval vibe. These nasty tools are made to shred demons into bits. Each weapon has different versions, giving you more choices than ever. From the iconic Super Shotgun to the brutal Pulverizer, there’s a ton to play with. Below, we’ve grouped all the weapons by tiers based on how easy they are to use—S-Tier being the simplest for anyone to pick up, down to D-Tier for those needing serious skill.
S-Tier: Super Easy to Use
These weapons are a breeze to handle, needing little precision and working great in most fights.
Combat Shotgun
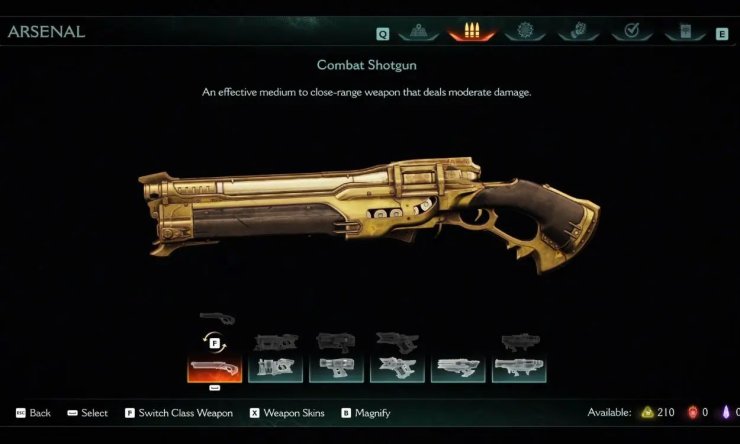
This bad boy’s back from Doom 2016 and Eternal, looking a bit more medieval but working mostly the same. It’s S-Tier because its wide spread and point-and-shoot style make it a breeze to use, even in crazy fights. No more grenade lobbing, but upgrades let it set enemies on fire.
Upgrades include:
- Incendiary: Enough damage burns demons, making them drop armor.
- Smelt: Burned demons drop more armor.
- Blast: Burning enemies explode when they die.
- Tune Up: Adds a quick three-shot burst mode.
- Flare-Up: Instantly burns weaker enemies.
- Eat This!: Fires more pellets per shot.
Super Shotgun
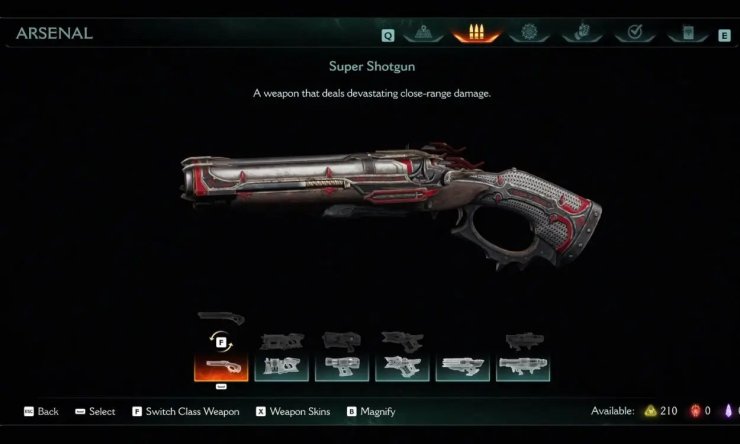
Doomguy’s double-barrel beast is back, hitting like a truck and earning S-Tier for its simple, devastating close-range blasts. No grappling hook this time, which might bum some folks out, but it keeps things straightforward. It’s got a slight redesign with spikes and old-school engravings.
Upgrades:
- Speed Loader: Cuts time between shots.
- Shatter: Boosts armor damage.
- Eat This!: More pellets per shot.
Grenade Launcher
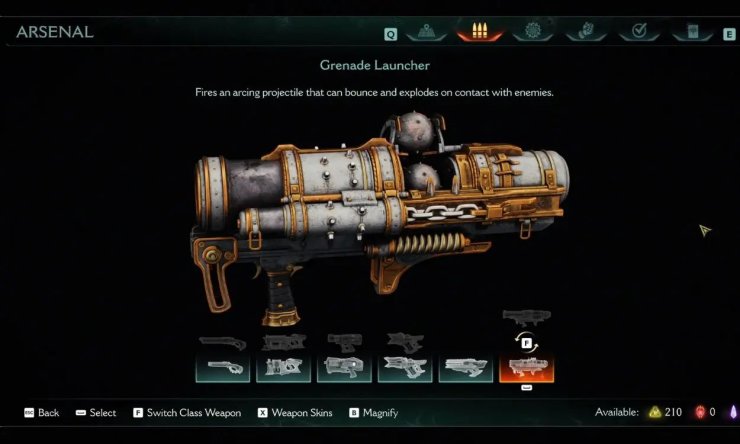
It shoots grenades that bounce off walls and blow demons to bits, earning S-Tier for its forgiving aim and crowd-clearing power. Upgrades unlock cluster grenades after multiple hits.
Upgrades:
- Fragment: Every third hit drops cluster grenades for area damage.
- Rupture: Direct hits on Shield Saw-affected demons drop cluster grenades.
- Cataclysm: Every second direct hit drops cluster grenades.
A-Tier: Very User-Friendly
These are slightly trickier but still super accessible, with clear mechanics and forgiving handling.
Pulverizer
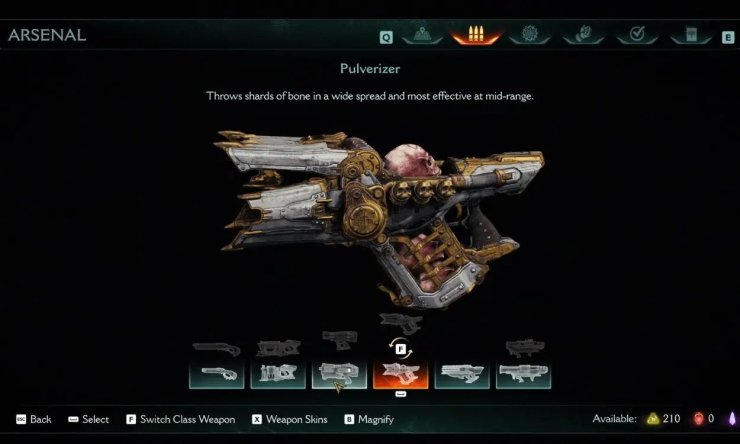
This thing stole the show in the first gameplay reveal and lands in A-Tier for its forgiving spray-and-pray style, though charge management adds a touch of complexity. It grinds skulls into shards and spits them at enemies, perfect for mowing down demon hordes while moving. Upgrades:
- Runic Skull: Kills build charge, boosting speed and fire rate at max.
- Runic Strike: Melee hits build and keep charge.
- Flay: Fires more shards over a wider area.
Rocket Launcher
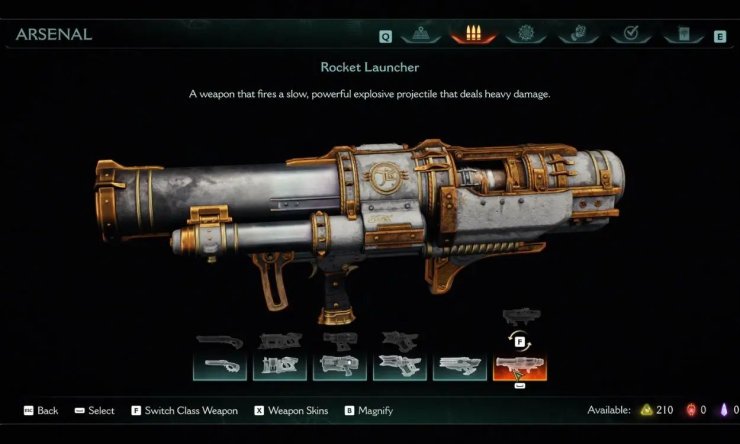
The classic Rocket Launcher is back, firing slow, explosive rounds that wreck demons, landing in A-Tier for its splash damage but requiring some timing due to slow projectiles. Upgrades:
- Cannibalism: Parrying a Heal Surge makes self-damage heal you briefly.
- Cooked: Parrying a Hell Surge powers up your next shot.
- Blood Sacrifice: Bigger splash damage but more self-damage.
- Bloodlust: Cannibalism lasts longer.
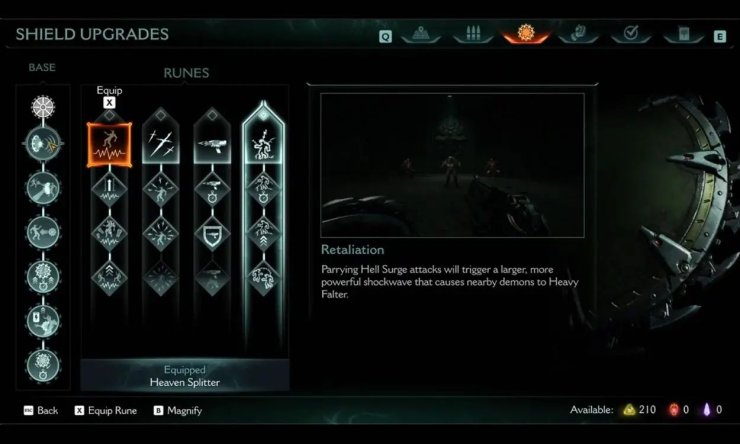
Shield Saw
The heart of the game’s combat, this shield blocks, parries, bashes, or boomerangs at demons, plus it’s a chainsaw for tearing flesh, making it A-Tier for versatility but needing practice for parries. It’s also a movement tool. Base upgrades improve range and recharge, while Shield Rune attachments add special damage effects.
B-Tier: Moderate Learning Curve
These need a bit more aim or situational know-how but are still pretty manageable with practice.
Accelerator
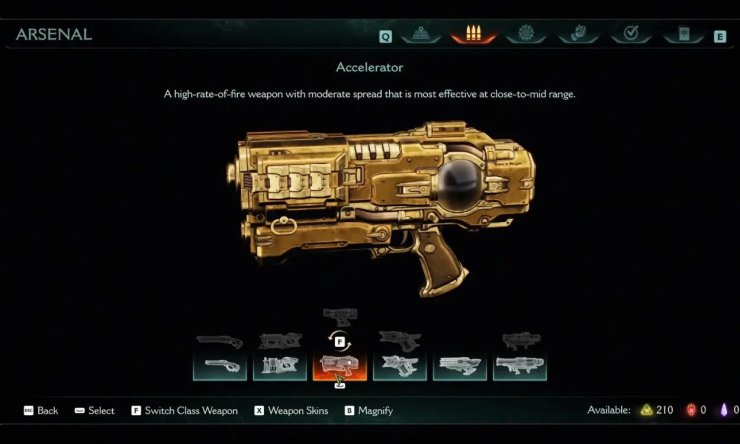
This feels like Doom Eternal’s Plasma Rifle, with fast shots and a bit of spread for close-to-mid-range fights, placing it in B-Tier since you need to keep hitting to build charge. Damage ramps up as you land hits. Upgrades:
- Feedback: Shots build charge, boosting damage at max.
- Stabilizer: Tightens spread at max charge.
- Modulator: Speeds up fire rate at max charge.
- Heatblast: Max charge shots release a damaging blast, using up charge.
- Mega Cell: Charge lasts longer.
- Overload: Max charge shots supercharge for extra damage.
Cycler
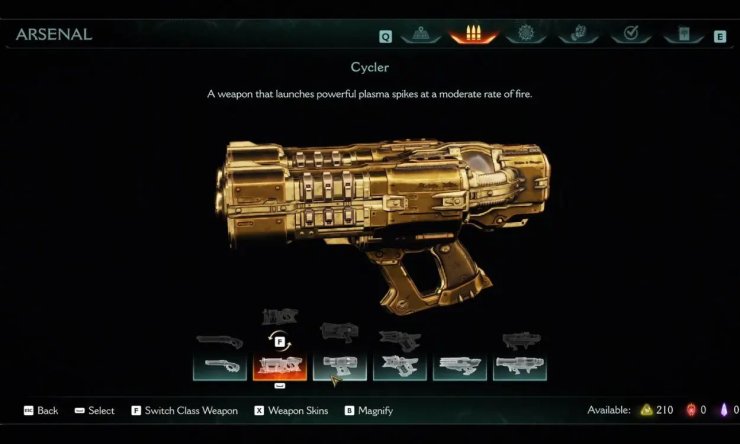
A twin-barrel Accelerator that shoots plasma spikes at a steady pace, also B-Tier because its longer range demands better aim than shotguns. Its long-range shots shock enemies, making them take more damage.
Upgrades:
- Shock: Enough damage shocks demons, boosting your attacks and arcing lightning to nearby foes.
- Amplify: Shocked enemies take even more damage.
- Fulmination: Shock lasts longer.
- Overload: Killing shocked demons builds charge based on their size.
Power Gauntlet
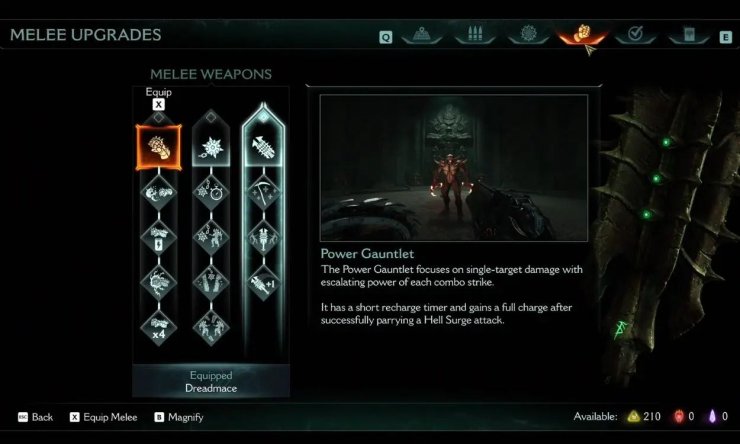
This spiked glove dishes out heavy single-target damage, getting stronger with combos, landing in B-Tier since melee range is risky but the mechanics are clear. Parrying a Hell Surge fully charges it.
Upgrades:
- Finisher: Boosts final combo hit damage.
- Duelist: Parries speed up melee regen.
- Jolt: First combo hit shocks enemies.
- Encore: Adds a fourth combo hit.
C-Tier: Requires Skill
These demand better aim, coordination, or combos, making them less forgiving for new players.
Shredder
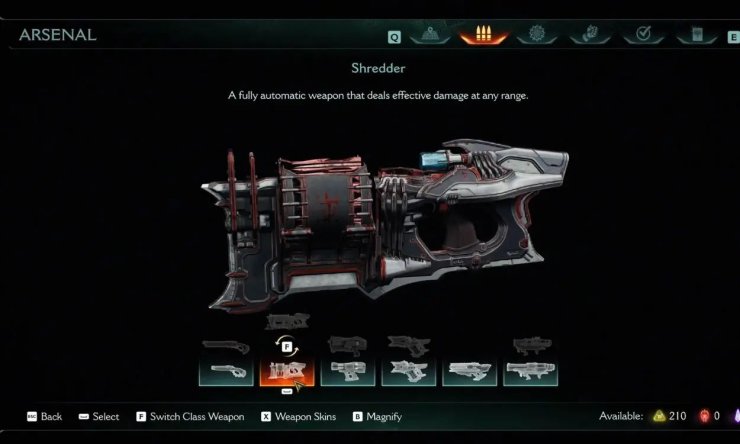
Think of the Shredder as a beefy SMG firing spike-shaped rounds crazy fast, but it’s C-Tier because maximizing its potential requires coordinating ricochet and detonation upgrades with shield moves. It tears through demon flesh, and upgrades let spikes bounce or explode.
Upgrades:
- Pincushion: Enough damage triggers an area blast with a shield throw or parry.
- No Frills: Speeds up fire rate.
- Barbed: Bounced or detonated spikes hit harder.
Ravager
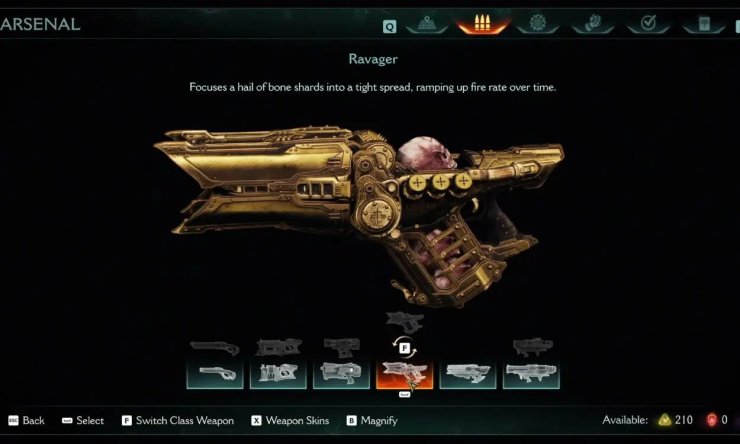
A focused version of the Pulverizer, shooting bone shards in a tighter stream, making it C-Tier due to tighter aim and slower charge buildup. Upgrades let you grab health and ammo at full charge.
Upgrades:
- Vampirism: At max fire rate, damaged demons drop health.
- Ignition: Reaches max fire rate faster, no movement penalty.
- Slow Burn: Higher max fire rate but takes longer to hit.
- Supplier: Damaged demons drop ammo.
Flail
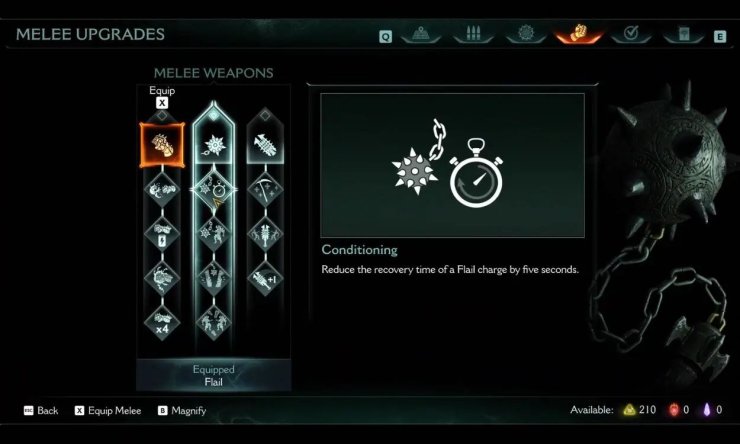
A spiked ball on a chain, it smashes armor and blasts nearby demons, but it’s C-Tier due to risky melee range and combo focus. Combo hits can end fights fast.
Upgrades:
- Conditioning: Cuts Flail charge recovery by five seconds.
- Ignite: Hit demons burn and drop armor.
- Resonant: Strikes hit harder and generate armor.
- Engulf: Scorches nearby demons for armor drops.
D-Tier: Advanced Use
These are the toughest to master, needing precise aim, timing.
Impaler
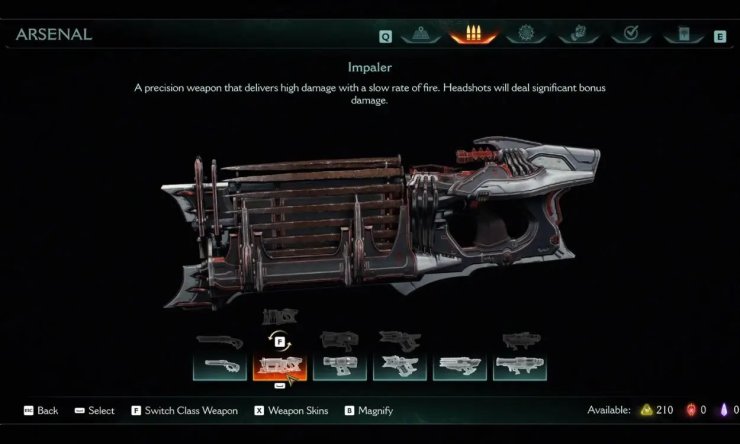
Like the Shredder but slower and precise, the Impaler shoots one powerful spike at a time, landing in D-Tier due to its need for pinpoint accuracy and timing. It can stagger demons or pin smaller ones to walls.
Upgrades:
- Stalwart: Shield moves or parries drop Impaler ammo.
- Salvage: Grabbing ammo boosts your next shot.
- Chronospike: Holding the trigger slows time for stronger shots.
- Lobotomy: Headshots refill melee charge.
Chainshot
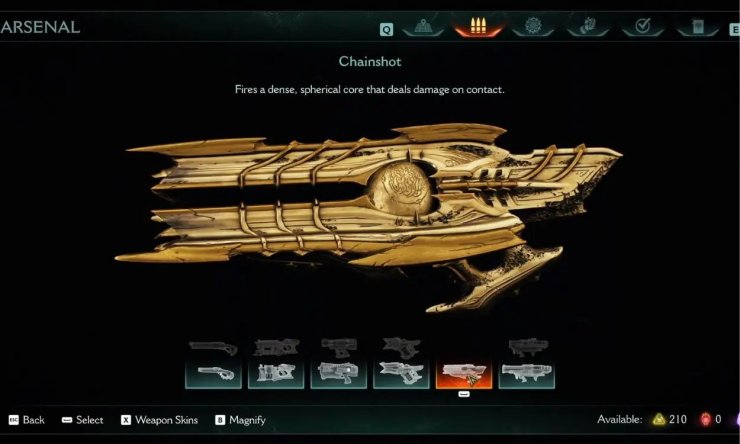
This launcher fires a heavy ball on a chain after a quick charge, but it’s D-Tier because charging and precise aiming make it less intuitive. It smacks demons hard.
Upgrades:
- Eldritch Blessing: Parrying a Hell Surge instantly charges your next shot.
- Gravitational Flux: More armor damage at max charge.
- Cosmic Breach: Max charge shots explode on impact.
Dreadmace
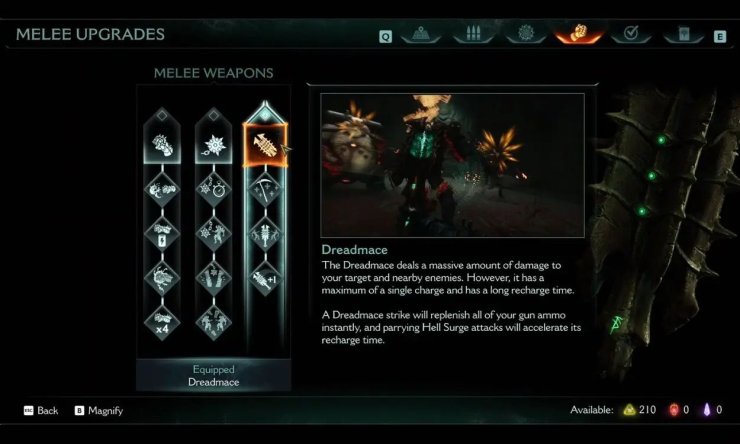
This spiked mace crushes bones and guts demons with one swing, but it’s D-Tier for its slow swings and high-risk melee range.
Upgrades:
- Reaper: Kills drop extra health.
- Obliterator: Hits damage nearby demons more.
- Riposte: Parrying a Hell Surge with a charged mace gives an extra attack.
Special Tier: Unique Purpose
This weapon has a distinct role, built for rare, high-impact situations rather than regular use.
Ballistic Force Crossbow
The BFG of The Dark Ages, this crossbow sits in the Special Tier because it’s designed for massive AoE damage, not everyday combat. It shoots an Eldritch Lance that obliterates demons but is limited to three charges with scarce ammo, and you can’t use the Shield Saw with it. Its unique purpose makes ease of use less relevant—it’s a situational nuke for tough fights.


Comments