Have you ever tried to build a desktop PC by yourself? If you haven't you should try to do it once. Then you will get experience at least one mishaps while doing it. It always happens too, believe me. Whether you intend to build a gaming RBG light system with liquid cooling or just a basic rig, building a computer is always a little bit complex.
But all these failures are learning opportunities for me. Then I stumbled upon a Reddit thread about “let’s talk about all the times we screwed something up”.
So if you are looking for a few tips and trick, here are my favorite stories:
Check your cables - Always
The story of jgodin03 redditor is a very familiar one. I also have accidentally put an HDD power cable in the wrong way. Back then I didn't realize that the fried cable has caused smoke and stink which emanate the whole of my chassis. The only thing I did notice is that my hard drive wasn't turning on. Then I looked back on the cabling to check if everything were correct, I started to realize the hard reality.
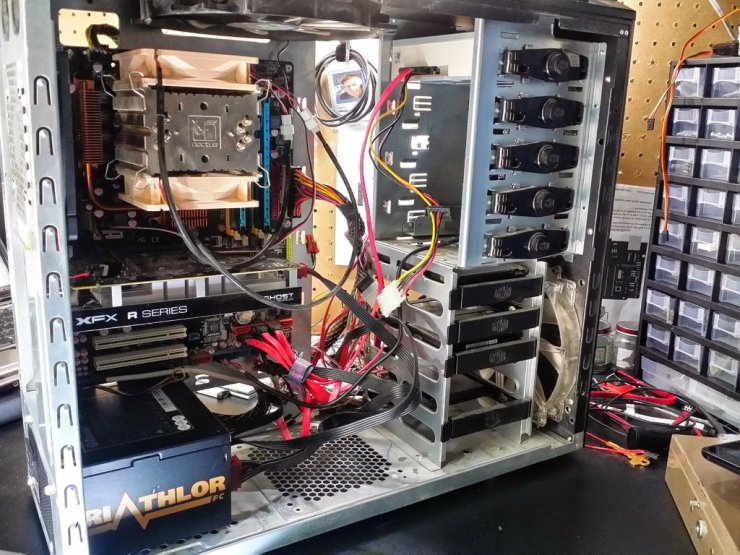
Once again, this issue happened and got out of my control because of the first time anxiety and my lack of general troubleshooting know-how. As it no doubts, easier to test and retest the cable rather than buying a new drive, replace it and wipe away the tears from losing all of your data.
So remember that the first big step is troubleshooting the cables. From my experience, you just need to unplug and plug everything in on the desktop system. You could never know which cable works and which doesn't. The less you have to replace or remove the hardware the better it is.
Remember that switch
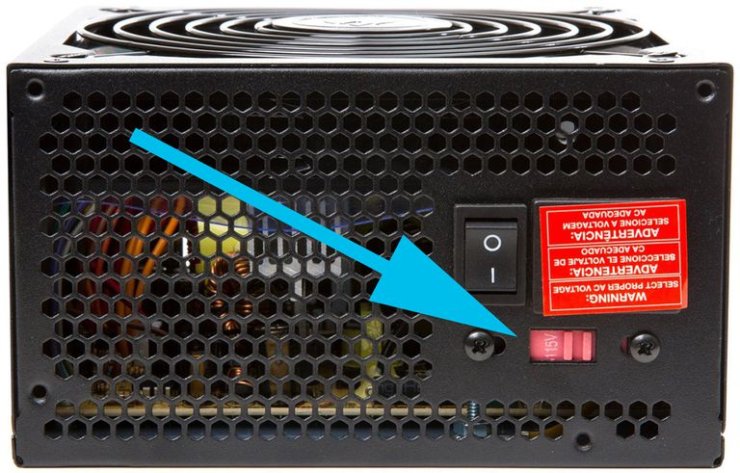
I have done what mrwillard95 did by myself. But I think it is kinda a classic one that could happen to any inexperienced PC builder. Keep in mind that the power supplies usually have a small switch on the side. You will need to turn it on before you could actually turn on your PC on. If you don't turn on that switch, then all the plugged-in PSU won't do anything nor you could power on your PC.
Remember that IO shield
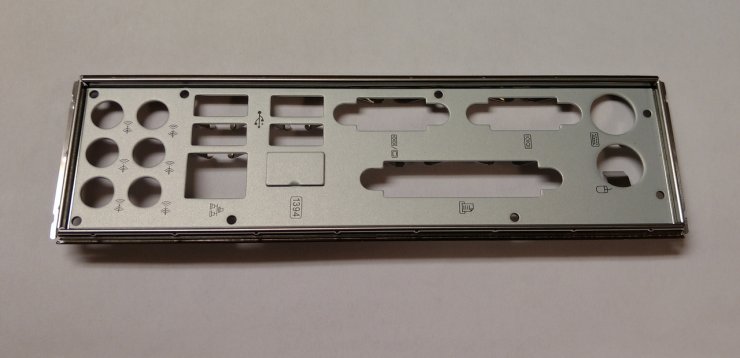
The issue of Cantstandyuh is the one that I have repeated many times. So many to the point that now I always place the motherboard’s IO shield in a highlighted location before I connect the motherboard to the tray. Believe me, it is really easy to miss this step in when you build a new PC. If you miss it - it will cost you lots of precious time later on because then you will have to pop out the graphics card, pull out some cables, detach the motherboard to free up space to squeeze the IO shield into its place.
Sure, your system can still work fine without the shield. But it will help keep all the dust out of your system and make the back of the case look better.
Skip the steps
Just like the steps from the builder Kasilim, it is one great reminder that cutting corners and jumping steps might look great on papers. But in reality, it is a totally different story which could lead to disastrous result. I have been there - skipping a few screws or even not mount the GPU on to the case, poking the front-panel headers of the motherboard with your screwdriver. Or even worst install a liquid cooling system without even do a leak test. My advice is that you really should spend those extra minutes to avoid your PC from an expensive accident.
The most important thing - is Cooling
Always remember that the natural tendency of your computer is getting hot. While in the case of Neilshh system should be powered off by itself before the temperature reaches a critical level. However, you wouldn't want to put your expensive PC components in that type of predicament. Be sure that your fans are always working and secured so they keep on cooling your GPU and CPU. By the way, you need to clean those vents to increase airflow too.
PC parts could be sharp
For the case of Oshien, I have been there and done that before. I used to slice my small fingers up with those metal fins that you can find in the aftermarket coolers. Usually, I don't notice it because it doesn't sting much but then suddenly I found a red spot on the motherboard. Then I had to do a quick trip to the bathroom for band-aid and alcohol.
Use the standoffs
Those standoffs come with your motherboard's bag of accessories is for its reason. You should use them - and avoid the mistake of IM_the_Mark. By the way, you should use the standoff that comes with your motherboard, don't substitute it out because you could meet some compatibility issue.
The CPU is very fragile
Remember that the CPU is the heart of your desktop PC and those little pins under it are very precious. Treat them with all the care in the world. In every circumstance, do not spread the thermal paste over them. Bend them is a big no either. Do absolutely everything you could to make sure that they don't get bend when you handle the CPU. Keep in mind that only a slight bend could mean an expensive hurt like D3M0N2.
Not like him, do not throw the CPU. Make sure that it doesn't go flying anywhere.
Be sure before you connecting something
I know that some parts on the motherboard look very similar even to an experienced PC builder. Short_Bus_Driver has shown us that we should always read the manual carefully and double or triple check every cable that we connect. There might be some alternative connections that you don't know or something you might even need to check the BIOS to enable the connection. Just take time to understand carefully your motherboard.


Comments