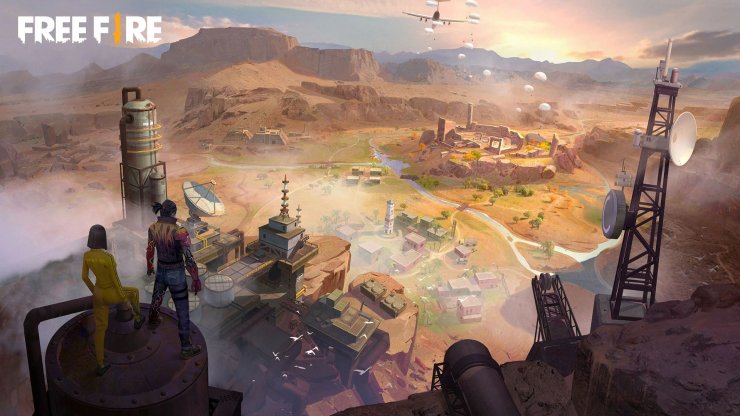
The Kalahari map in Free Fire is the go-to map if you want fast, intense fights. This compact map, hosting up to 50 players, has sandy grounds, rocky cliffs and scattered buildings, which is perfect for close-up battles.
There are some spots for long-range sniping from high points. Its open areas with little cover mean you’ve got to think quick and move smart, making it great for players who love action-packed matches.
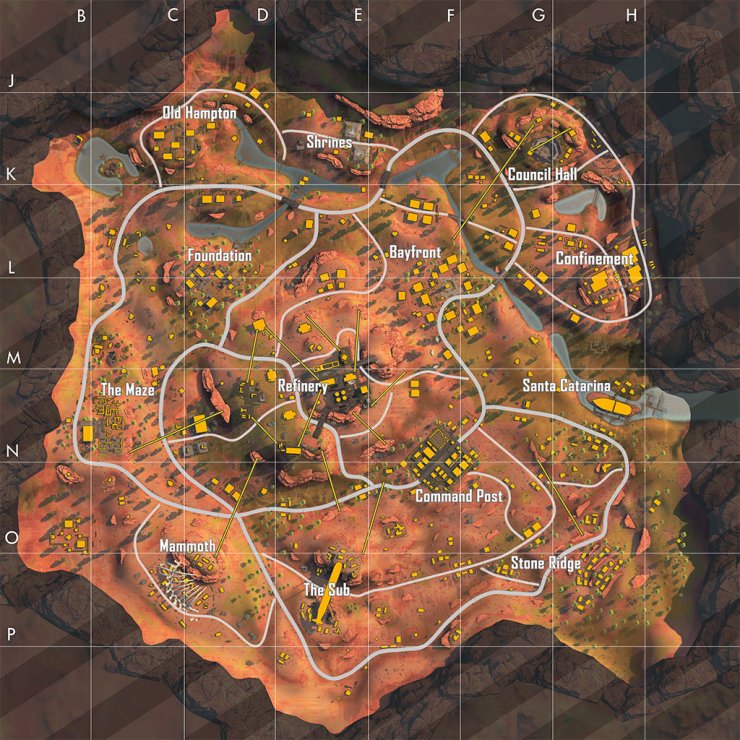
Map Layout and Key Features
Kalahari is a flat, desert map with cliffs, open sands, and a few clustered structures, setting up both short-range scraps and occasional long-distance shootouts. You’ll find high ledges for scouting, but the lack of natural cover forces you to use buildings or barriers like Gloo Walls. Notable features include tight building corridors for ambushes, elevated spots for overwatch, and open areas that punish bad rotations. The map’s smaller size makes the safe zone shrink fast, ramping up pressure by mid-game.
Key locations include:
- Refinery: Industrial spot with towers and tight paths, packed with loot but busy.
- Command Post: Group of buildings for wild early fights.
- Old Hampton: Northern area with fewer buildings, quieter start.
- Shrines: Upper map spot with spots to hide.
- Foundation: Northern zone for low-key looting.
- Bayfront: Balanced area with moderate action.
- The Sub: Submarine structure with tents and sniper gear.
- Mammoth: Area with a big skeleton for cover, lots of supplies.
- Stone Ridge: Compounds with terraces for spotting enemies.
- Confinement: Main building with weapons, great for ambushes.
- Quarry: Chill spot for gearing up.
About 11-12 points of interest total, focusing on smart positioning rather than sprawling exploration.
Best Landing Spots
Where you drop sets the tone—go aggressive for hot zones or play it safe for steady gearing. Here are the top spots for 2025, based on loot, risk, and playstyle:
1. Refinery
- Description: Central industrial area with towers and narrow paths.
- Loot Potential: Top-notch weapons, armor, and gear.
- Risk Level: High, draws a crowd.
- Tips: Jump here for early fights; grab SMGs like MP40 for tight spaces. Lock down high ground fast to own the area.
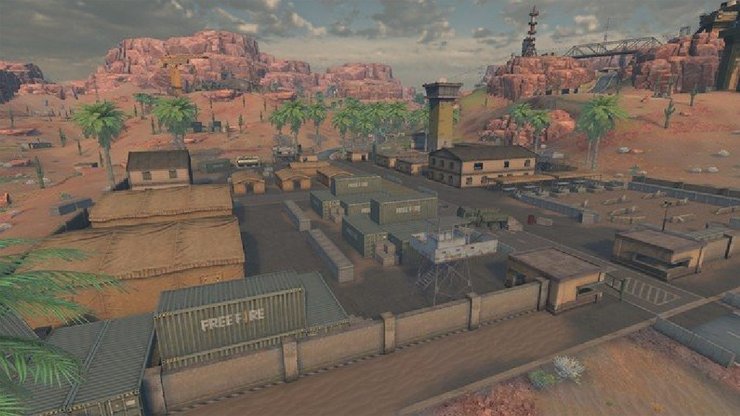
2. Command Post
- Description: Military buildings bunched together.
- Loot Potential: Decent, with weapons and items spread out.
- Risk Level: High, expect messy early battles.
- Tips: Good for squads; push with shotguns. Stay sharp for ambushes inside buildings.
3. Mammoth
- Description: Spot with a huge skeleton for cover.
- Loot Potential: Plenty of ARs, shotguns, and supplies.
- Risk Level: Low to medium, less traffic.
- Tips: Solid for calmer play; loot up and use the skeleton for defense in fights.
4. Old Hampton
- Description: Northern area with spread-out buildings and hideouts.
- Loot Potential: Even spread of ammo and essentials.
- Risk Level: Low, not too crowded.
- Tips: Great for rank pushers; gear up and head south. Check the plane path to avoid getting caught off guard.
5. The Sub
- Description: Submarine flanked by mountains, with tents nearby.
- Loot Potential: Rare gear, often sniper rifles.
- Risk Level: Medium, high ground attracts attention.
- Tips: Drop here for sniping spots; use elevation to track rotations. Pair with ARs for mid-range fights.
Other good picks: Shrines for quiet starts with minimal fights, and Bayfront for balanced loot and action.
Strategies and Tips
- Playstyle Adaptation: Use high spots like Refinery’s platforms for sniping with marksman rifles; switch to SMGs or shotguns in tight areas like Command Post. If you’re laying low, loot at Mammoth or Old Hampton before jumping into fights.
- Rotation and Zone Management: Start at Old Hampton or Shrines for quick gear, then move central while avoiding open sands. Zigzag and use Gloo Walls to cross exposed areas, since zones close fast.
- Loot and Combat: Grab weapons early at hot drops but bail if you’re outgunned. For squads, split roles: scouts to spot, rushers to attack, snipers to cover. Hit training mode to sharpen aim for Kalahari’s mix of ranges.
- General Advice: Watch for ambushes near cliffs or elevations. In 2025, team with characters like Hayato for tanking damage or Alvaro for explosive plays in tight spots. Pick drops based on plane paths and squad setups for the best shot at a win.
This guide uses 2025 info to help you dominate Kalahari. Stay tuned to official Free Fire channels for any updates!


Comments