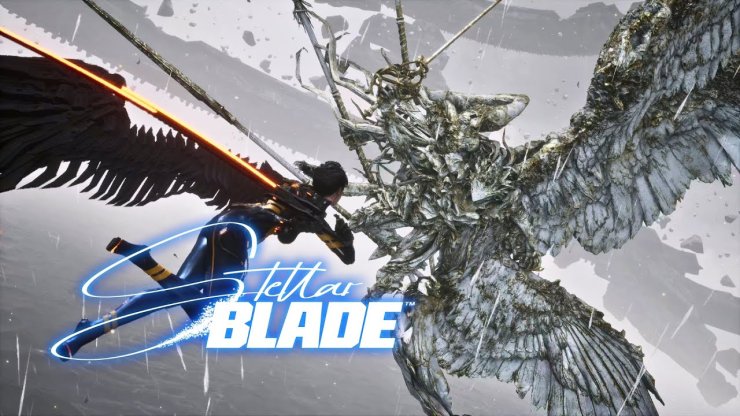
Stellar Blade’s combat is a thrilling blend of Soulslike precision and cinematic, fast-paced action, making every boss fight feel like a scene from a sci-fi blockbuster. With dynamic camera work, fluid attack animations, and a steep learning curve, you’ll need sharp parries, quick dodges, and strategic Beta skill use to conquer the game’s toughest foes. Below is a complete guide to all 12 main story bosses in Stellar Blade, plus 6 optional/repeat bosses, the secret post-game boss Mann, and the Goddess of Victory: Nikke DLC boss Scarlet, ordered by their appearance in the game with detailed strategies to defeat them. Whether you’re slicing through Naytibas on Story Mode or sweating it out in Hard Mode, these tips will help you emerge victorious.
1. Gigas
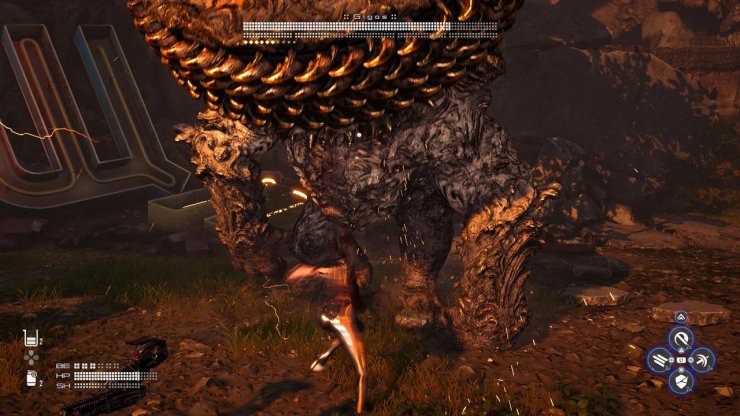
Location: Xion City Entrance (main story, early game).
The first major boss, Gigas is a massive Naytiba brute in the ruins of Xion. Its slow but devastating melee slams and shockwave attacks introduce you to Stellar Blade’s parry-focused combat. Its cinematic scale makes it intimidating, but it’s a straightforward fight once you learn its patterns.
Tips:
- Parry its slams: Gigas’s heavy attacks (e.g., double-fist slam) have clear wind-ups—parry these for big stagger damage.
- Use Blink (unlocked early) to dodge its unblockable shockwave (red glow).
- Stay close to its legs and use Triplet (Beta skill) to chip away at its stagger bar.
- Equip Reflex-Type Exospine to tighten parry windows.
- Watch for its grab attack—dodge laterally to avoid it.
Difficulty: 5/10
A beginner-friendly boss, but its high damage can punish sloppy play.
2. Abaddon
Location: Parking Tower, Xion (main story, early game).
Abaddon is a dual-wielding Naytiba with fast, aggressive combos that test your parry timing. Its cinematic sword swings and lightning-charged attacks feel like a duel in an action flick, forcing you to stay on your toes.
Tips:
- Perfect parry its combos: Abaddon’s three-hit sword flurry is parryable—time it right to counter with Triangle attacks.
- Use Shock Wave (Beta skill) to interrupt its charge-up moves (glowing blue).
- Keep mid-range to bait its lunging attacks, which are easier to parry.
- Equip Double Dodge Exospine for extra evasion against its quick follow-ups.
- Shoot its back weak point with the Drone during stagger phases for bonus damage.
Difficulty: 6/10
Its speed ramps up the challenge, but predictable patterns make it manageable.
3. Corrupter
Location: Wasteland, Altar (main story, mid-game).
This grotesque Naytiba lurks in the Wasteland, using tentacle-like limbs and poison clouds to overwhelm you. Its cinematic, chaotic attacks require constant movement and precise interrupts to survive.
Tips:
- Stay mobile: Dodge its sweeping tentacle attacks and avoid standing in poison pools.
- Use Slash (Beta skill) to break its stagger bar during melee combos.
- Shoot its glowing core with the Drone to interrupt its poison cloud attack.
- Equip Protection-Type Exospine to reduce damage from its area-of-effect moves.
- Perfect parry its slower tentacle slams for big counter windows.
Difficulty: 6.5/10
The poison mechanic and multi-limb attacks demand good positioning.
4. Stalker
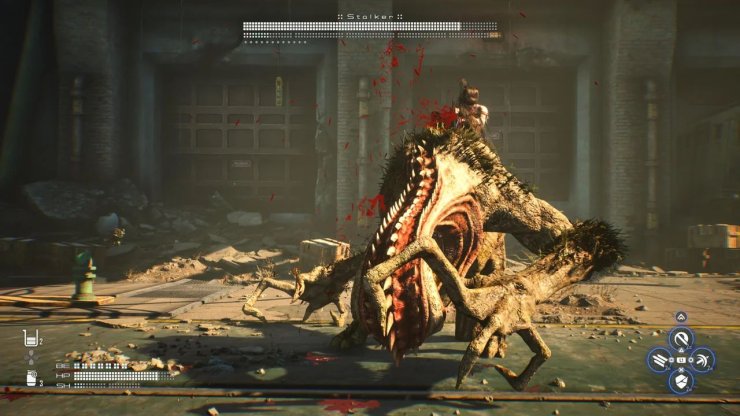
Location: Wasteland, Bar 99 (main story, mid-game).
Stalker is a sleek, panther-like Naytiba with lightning-fast dashes and claw combos. Its cinematic agility and relentless pressure make it a wake-up call for players relying too heavily on offense.
Tips:
- Parry its claw combos: Stalker’s three-to-four-hit claw attacks are parryable—time them to build stagger.
- Use Blink to dodge its unblockable dash (red glow).
- Stay mid-range to bait its telegraphed leaps, then counter with Triplet.
- Equip Stagger-Type Exospine to break its defenses faster.
- Avoid getting cornered—its combos can trap you against walls.
Difficulty: 7/10
Its speed and aggression punish overconfident players.
5. Unidentified Naytiba
Location: Great Desert, Buried Ruins (main story, mid-game).
This humanoid Naytiba is a brutal mid-game test, blending lightning-fast combos with a deadly instant-kill orb attack. Its fluid, dance-like movements are visually stunning but punish greedy playstyles, requiring precise parries and interrupts.
Tips:
- Shoot the yellow orbs: Use the Drone to destroy glowing orbs during its instant-kill attack (marked by a charge-up animation).
- Parry its combos: Focus on parrying its three-hit sword flurries to build stagger.
- Use Triangle counters after parries for heavy damage.
- Equip Beta-Type Exospine to boost Beta skill damage during stagger phases.
- Stay mid-range to read its telegraphed attacks and avoid its grab move.
Difficulty: 7.5/10
The orb mechanic and fast combos make it a steep challenge.
6. Juggernaut
Location: Matrix 11, Central Core (main story, mid-game).
Juggernaut is a towering mech-like Naytiba with heavy melee slams and explosive ranged attacks. Its cinematic, earth-shaking moves and shield phase demand precise timing and Beta skill use to break through.
Tips:
- Dodge its slams: Roll through its massive melee attacks to avoid heavy damage.
- Use Shock Wave (Beta skill) to break its shield in the second phase.
- Save interrupts for its telegraphed explosive volleys (glowing red).
- Equip Stagger-Type Exospine to shorten the shield phase.
- Stay aggressive after breaking the shield—use Slash for high damage.
Difficulty: 7/10
Its power is intimidating, but clear tells make it manageable.
7. Belial

Location: Matrix 11, Flooded Commercial Sector (main story, mid-game).
Belial is a hulking Naytiba with devastating melee hits and ranged energy blasts, especially brutal in Hard Mode. Its cinematic attacks hide fast follow-ups, and its shield phase requires precise Beta skill timing to break.
Tips:
- Dodge its heavy slams: Roll laterally to avoid getting crushed.
- Use Shock Wave or Triplet to break its shield during the second phase.
- Save interrupts for its energy attacks (marked by a blue glow).
- Equip Stagger-Damage Exospine to speed up shield-breaking.
- Perfect parry its slower melee attacks for big counter opportunities.
Difficulty: 7/10
Its relentless pressure is tough but less chaotic than later bosses.
8. Tachy
Location: Eidos 7, Solar Tower (main story, mid-late game).
Tachy is a high-speed android with acrobatic sword combos and energy projectiles. Her cinematic flips and relentless attacks feel like fighting a cyberpunk assassin, testing your parry and dodge skills.
Tips:
- Parry her sword combos: Her four-hit flurries are parryable—time them for counters.
- Use Blink to dodge her unblockable energy slashes (red glow).
- Equip Reflex-Type Exospine to tighten parry windows.
- Use Overdrive (Beta skill) during stagger phases for massive damage.
- Stay mobile to avoid her projectile barrages.
Difficulty: 7.5/10
Her speed and mix of attacks require sharp reflexes.
9. Raven

Location: Spire 4, Abyss Levoire (main story, late game).
Raven is a nightmare swordsman with breakneck speed and two brutal phases. Her smooth sword swings, flips, and unpredictable combos are like fighting a Soulsborne legend, demanding perfect parries and patience.
Tips:
- Learn her patterns: Her three-hit sword combos are parryable—focus on the final strike for counters.
- Use Quartett (Beta skill) to disrupt her stagger bar.
- Equip Parry-Type Exospine for tighter parry windows.
- Stay calm and avoid greedy attacks—her second phase adds faster, deadlier moves.
- Dodge her unblockable spin attack (red glow) with Blink.
Difficulty: 9/10
Her relentless speed and combo chains are a true test of skill.
10. Karakuri

Location: Spire 4, Vermillion Garden (main story, Eye of the Hurricane mission).
Karakuri is a grotesque robotic-organic hybrid with multiple faces, tendrils, and a glowing wheel above its head. Encountered in the Vermillion Garden, this boss unleashes devastating laser beams and summons Kokeshi minions, making it a chaotic, cinematic fight that tests your mobility and crowd control. Your Drone is disabled at the start, limiting ranged options.
Tips:
- Dodge the laser beams: Karakuri’s rotating laser (yellow glow) sweeps horizontally or vertically—double jump to avoid horizontal sweeps or dodge sideways for vertical beams. Use Perfect Dodge to build Burst Energy.
- Clear Kokeshi minions: Use Slash (Beta skill) to wipe out summoned Kokeshi robots, which explode if ignored. Prioritize the second wave at 60% HP, as it spawns more.
- Parry melee combos: Karakuri’s three-hit claw combo (two swipes, delayed overhead slam) is parryable—time the final hit for a Triangle counter. Avoid attacking during its red enrage combo (four hits).
- Interrupt blue attacks: Use Blink to counter its blue grab or slash attacks, which deal heavy damage if they connect.
- Equip Reflex-Type Exospine for better parry timing and Grenades to quickly clear Kokeshi or break shields in phase two (60% HP). Stay mobile to avoid its explosion attack (yellow glow with red sparks).
Difficulty: 7.5/10
Its laser and minion mechanics demand multitasking, but parry windows and clear tells make it manageable with practice.
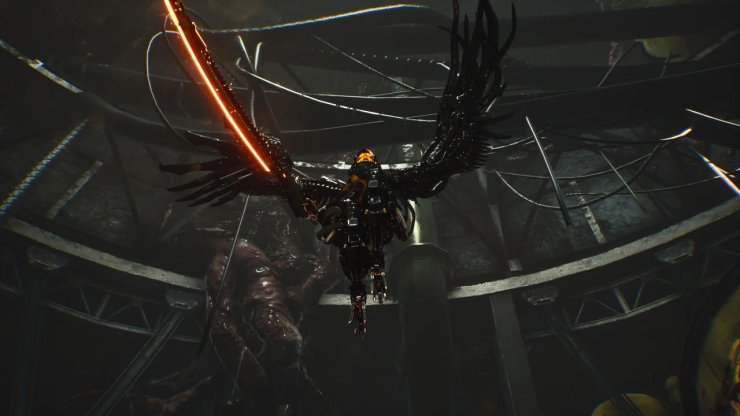
11. Democrawler & Demogorgon
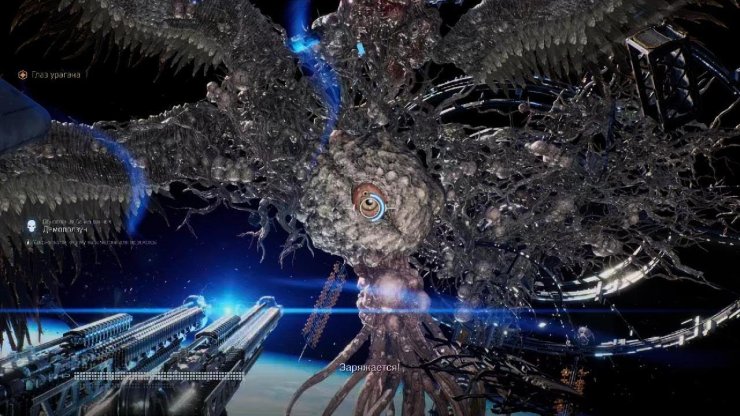
Location: Spire 4, Central Core/High Orbit Station (main story, Eye of the Hurricane mission).
Democrawler is a grotesque Elite Naytiba with tentacles, multiple heads, and a light halo, fought in the Central Core. Its multi-phase fight escalates with a sword and aggressive ranged attacks, culminating in a scripted space sequence against its true form, Demogorgon, an Alpha Naytiba. The Democrawler fight is challenging, while Demogorgon is a straightforward railgun sequence.
Tips for Democrawler:
- Stay close: Close range reduces its projectile attacks (light orbs, lasers). Parry its three-hit claw combo or sword swings (after 80% HP) to build stagger.
- Dodge unblockable attacks: Use Blink for its blue grab or dash attacks and double jump to avoid yellow AOE slams or shockwaves (two waves at 40% HP).
- Evade ranged attacks: Run sideways to dodge light orbs or pillars of light from its halo. At 40% HP, its front laser beams increase to five—sprint far back to evade.
- Break the sword phase: Use Shock Wave or Triplet (Beta skills) to stagger it after it spawns a sword (80% HP). Avoid attacking during the sword-summoning animation.
- Equip Stagger-Type Exospine to speed up stagger in later phases and Protection-Type Exospine to survive its purple unblockable slash (rare but deadly). Finish with a QTE (L1) when its health hits zero.
Tips for Demogorgon:
- Shoot the eyes: Use Eve’s Railgun (hold R2 for charged shots) to target Demogorgon’s large eye, then three smaller eyes, and the large eye again when it reopens. Follow Lily’s prompts for weak points.
- Stay calm: Demogorgon doesn’t attack during this scripted sequence, so focus on aiming accurately. No dodging or parrying is needed.
Difficulty: 8/10 (Democrawler), 3/10 (Demogorgon)
Democrawler’s aggressive melee and ranged attacks require precise timing, while Demogorgon’s scripted fight is a cinematic breather.
12. Providence (Merge-with-Adam Ending)

Location: Orbit Elevator (main story, final boss, merge-with-Adam ending).
This giant robotic beast is a cinematic juggernaut, blending overwhelming speed with missile barrages, laser beams, and instant-kill slams. Its lack of clear tells makes parries tough, and its scale feels like a movie climax.
Tips:
- Stay mobile: Sprint to dodge missile storms and use cover when possible.
- Chip away with Drone shots or Gun attacks during ranged phases.
- Save Beta skills (e.g., Triplet or Shock Wave) for stagger phases.
- Equip Dodge-Type Exospine to improve evasion timing.
- Use Eve’s powered-up form (unlocked in the final phase) for boosted damage.
Difficulty: 8.5/10
Its massive attacks and instant-kill moves require precision and patience.
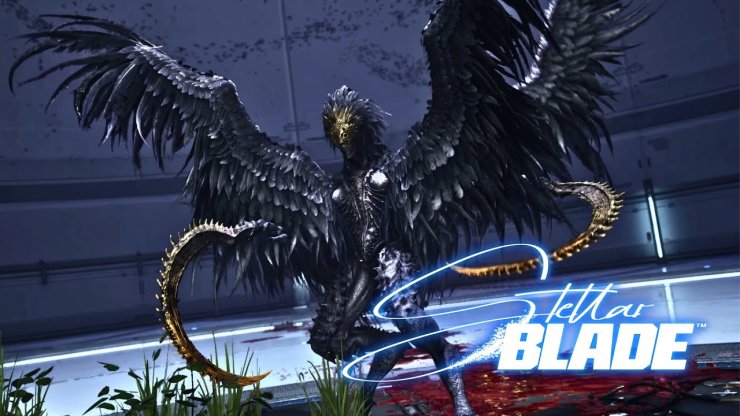
13. Elder Naytiba (Reject-Adam Ending)
Location: Naytiba Nest (main story, final boss, reject-Adam ending).
This angelic boss is a visual masterpiece, combining high-damage melee strikes with an instant-kill summon attack (spawning angelic minions). Its wild, cinematic patterns and area-of-effect blasts can overwhelm unprepared players.
Tips:
- Shoot summoned angels: Use the Drone to destroy them quickly and cancel the instant-kill move.
- Use Beta skills (e.g., Slash or Overdrive) to stagger it.
- Equip Defensive Exospine to survive its heavy hits.
- Keep moving to dodge its wide-ranging energy blasts.
- Perfect parry its slower melee attacks for big counter windows.
Difficulty: 8/10
The summon phase and high damage output require multitasking.
14. Mann (Secret Post-Game Boss)
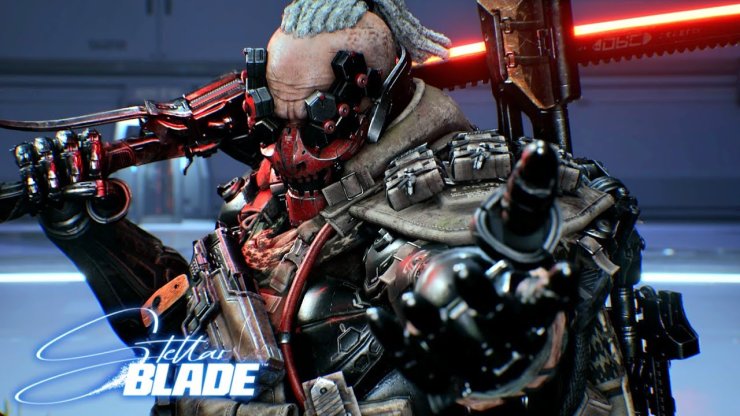
Location: Boss Challenge Menu (post-game, after completing the main story).
Mann is a secret boss exclusive to the Boss Challenge mode, unlocked after beating the game and rolling credits. Unlike other bosses, Mann is an NPC ally in the main story, but this post-game fight pits Eve against his versatile arsenal of dual swords, a long gun, and a hammer-spear hybrid that regenerates his health at 80% HP. His cinematic combos and ranged attacks make him one of the tougher challenges, rewarding the Royal Guard Suit upon defeat on Normal difficulty or higher.
Tips:
- Parry his sword combos: Mann opens with a long-range sword swing (big wind-up) and quick two-to-three-hit combos. Parry the final hit of each combo for Triangle counters to build Beta energy.
- Interrupt his jump charge: When Mann leaps back to charge a dash attack (blue glow), shoot with an Explosive Shell or use Shock Wave (Beta skill) to stagger him early.
- Handle the hammer-spear phase: At 80% HP, Mann summons a hammer-spear, regaining health to full for one bar. Dodge its heavy slams (yellow glow) and use Quartett or Overdrive to break his stagger bar quickly.
- Evade ranged attacks: Dodge laterally when Mann leaps back to fire his long gun (quick shot). Keep mid-range to bait his telegraphed melee attacks.
- Equip Parry-Type Exospine for tighter parry windows and Beta-Type Exospine for boosted Beta skill damage. Carry Lingering Potions to heal during brief pauses between combos.
- Stay patient: Mann’s health regeneration and mix of ranged/melee attacks punish aggressive play. Wait for openings after parries or dodges to strike.
Difficulty: 8.5/10
Mann’s versatile moveset, health regeneration, and high damage make him a formidable post-game challenge, though less punishing than Scarlet.
15. Scarlet (Goddess of Victory: Nikke DLC Boss)
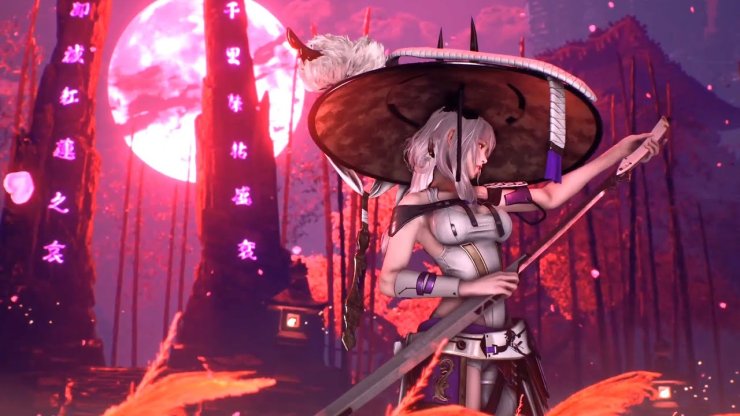
Location: Wasteland, Boss Challenge Menu (post-main story, Nikke DLC, released June 11, 2025).
Scarlet, the wandering swordswoman from Goddess of Victory: Nikke, is a formidable DLC boss introduced in the Nikke crossover. Known for her Yedo sword and lightning-fast combos, she’s a 1v1 duel that rivals Raven in intensity. Her two-phase fight features stylish cutscenes and a deadly instant-kill combo in phase two, requiring flawless parries and precise timing. Defeating her unlocks her outfit, hairstyle, and a new song for Eve.
Tips:
- Master parries in phase one: Scarlet’s four-hit sword combos are parryable—focus on timing the final hit for a Triangle counter. Her lunging thrust (blue glow) is a perfect parry opportunity.
- Survive the instant-kill combo in phase two: In her second phase (triggered at 50% health), Scarlet unleashes a five-hit combo ending in a one-hit kill (red glow). You must parry each hit perfectly, especially the final strike, or you’ll die instantly, even at full health. Practice in the training simulator to nail the timing.
- Use Quartet or Overdrive (Beta skills) to build stagger during openings after parries or dodges.
- Dodge her unblockable slashes: Use Blink to evade her unblockable spin attacks (red glow) and follow up with Shock Wave to interrupt her recovery.
- Equip Parry-Type Exospine to tighten parry windows and Beta-Type Exospine to boost Beta skill damage. A Beta skill-focused build is crucial for staggering her quickly.
- Stay mid-range: Keep enough distance to react to her telegraphed thrusts but stay close to punish her slower recovery animations.
- Stock consumables: Carry Shield Recovery and Beta Energy items to recover from mistakes, especially in Hard Mode, where her damage is brutal.
Difficulty: 9.5/10
Scarlet’s blistering speed, unforgiving instant-kill mechanic, and high stagger resistance make her arguably the hardest boss in Stellar Blade, surpassing even Raven on Hard Mode. Community feedback highlights her as a “superboss” that demands near-perfect execution.
Optional/Repeat Bosses
In addition to the 12 main story bosses, Stellar Blade features 6 optional or repeat bosses encountered during free exploration or side missions. These include variations of main story bosses (e.g., Quiel, Brute) with enhanced stats or new attacks, often tied to side quests or lairs. They drop valuable rewards like damaged Weapon Cores.
Notable Optional Bosses:
Quiel (Eidos 9): A side boss on Lily’s level, accessed via a side path with sword skating. Stronger than its story version, with new blue attacks. Use Shock Wave to stagger and dodge its unblockable slams.
Brute (Wasteland): A tougher version of the prologue Brute, with increased damage and a new grab attack. Parry its slower slams and use Blink for red glow attacks.
Dozer: A hammerhead shark-like Naytiba in Eidos 7. Dodge its charge attacks and parry its melee combos to stagger.
Maelstrom: Found in a side area, this boss has three weak spots and summons body bag enemies. Stay mobile, target weak spots with the Drone, and use Slash to clear summons.
Difficulty: Varies (6-8/10)
Optional bosses are tougher than their story counterparts, requiring adapted strategies and upgraded gear.
General Tips for Stellar Blade Boss Fights
- Upgrade Gear: Max out Eve’s Exospines, Drone, and Beta skills at camp terminals before tough fights. Prioritize Beta Energy upgrades for more frequent skill use.
- Stock Consumables: Carry Shield Recovery and Beta Energy items for emergencies, especially in Hard Mode.
- Practice Parries: Use the training simulator (unlocked in Eidos 7) to hone parry timing.
- Switch Loadouts: Tailor Exospines to each boss—Parry-Type for Raven and Scarlet, Dodge-Type for Providence, Stagger-Type for Belial, etc.
- Study Patterns: Spend the first minute of each fight learning telegraphed moves to exploit openings.
- Hard Mode: Unlocked after beating the game, it increases boss damage and speed, making parries and dodges critical.
Stellar Blade’s bosses are a thrilling gauntlet of skill and spectacle, with each fight delivering a cinematic payoff. Master their patterns, optimize your gear, and you’ll carve through Naytiba threats like Eve at her peak.


Comments