As a trainer in Umamusume: Pretty Derby, your main gig is to keep your Umamusume motivated, healthy, and on track to crush her racing goals. Training is a big part of her journey, but it’s not just about boosting her stats.
These Good conditions can give your Uma a nice boost, most of the bad ones can mess her up if you don’t deal with them quickly.
What Are Conditions?
In Career Mode, your Umamusume can pick up status effects called Conditions. These pop up randomly after stuff like Training Routines, Support Card events, or Races. Negative Conditions are more likely when her Energy is low.
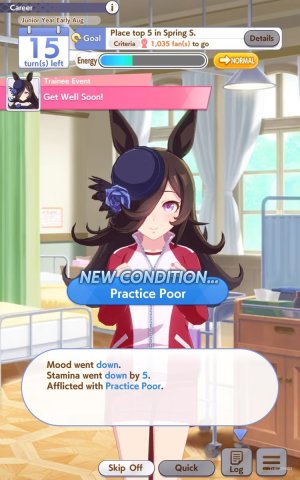
Conditions come in two flavors: Positive and Negative. They mostly affect how Training goes, either boosting stats, lowering failure risks, or, for the bad ones, forcing you to skip Training to let her Rest or hit the Infirmary. You can have multiple Conditions at once, especially the negative ones, if you don’t fix them fast. Positive Conditions stick around until they wear off or get replaced by another Condition.
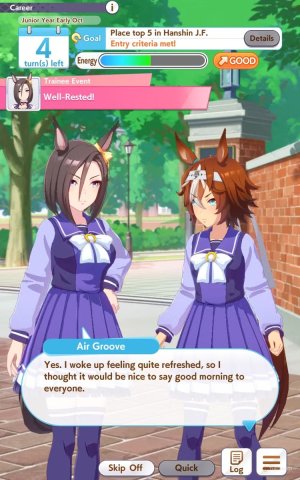
All Positive Conditions
Positive Conditions give your Umamusume temporary boosts during Training. Here’s what they do and how they show up:
| Condition | What It Does | How To Obtain |
|---|---|---|
| Practice Perfect | Lowers the chance of Training flopping. | Random chance after Training, a Support Card event, or failing Training. |
| Charming | Boosts Friendship gains with anyone. | Random chance after Training or Support Card event. |
| Fast Learner | Makes learning and upgrading skills cheaper. | Random chance after Training or Support Card event. |
| Hot Topic | Increases Friendship with Director Akikawa and Reporter Etsuko Otonashi. | Random chance after Training or Support Card event. |
All Negative Conditions
Negative Conditions are a pain and mostly show up during Training, especially if your Umamusume’s Energy is low, which makes failing Training more likely. You can check the Failure Chance when picking a Training Routine to decide if it’s worth the risk. Most Negative Conditions can be fixed with one Rest or Infirmary visit, but some might need a couple.
| Condition | What It Does | How To Obtain | How To Remove |
|---|---|---|---|
| Performance Poor | Makes Training more likely to fail. | Random chance after failing a Training routine. | Visit the Infirmary. |
| Night Owl | Drains Energy over time. | Random chance after Resting. | Visit the Infirmary. |
| Migraine | Stops Mood from improving. | Random chance after Training or a Race. | Visit the Infirmary. |
| Dry Skin | Mood might drop each turn. | Random chance after Training or a Race. | Visit the Infirmary. |
| Slacker | Your Umamusume might refuse to train. | Random chance after Training. | Visit the Infirmary. |
| Slow Metabolism | Blocks Speed Stat gains. | Random chance after Training. | Visit the Infirmary. |


Comments