The Ultimate Heist in The Elder Scrolls IV: Oblivion is the toughest quest you’ll face in the Thieves Guild storyline. It’s a beast of a mission that wraps up the guild’s arc with a bang, tasking you with snagging an Elder Scroll from the heavily guarded Imperial Palace. This guide breaks it down step by step in a straightforward way, covering prep, execution, and tips to dodge the many ways this quest can trip you up.
Preparation
Get your character ready before diving in—this quest isn’t forgiving:
Character Skills
-
Sneak: Aim for 50+ (75+ is better) to stay hidden. Higher perks make it easier.
-
Security: You’ll need to pick some tough locks, so get this to at least Adept.
-
Acrobatics: Helps with jumping and moving through tricky spots.
-
Illusion: Spells like Invisibility or Chameleon (or potions) make stealth a breeze.
-
Marksman: You’ll need to nail a precise shot with the Arrow of Extrication.
Equipment
-
Lockpicks: Bring at least 10. Hard locks can eat through them if you’re rusty.
-
Bow and Arrows: Grab any bow for the Arrow of Extrication; pack extra arrows for practice.
-
Potions/Scrolls:
-
Stock up on Invisibility potions (5 or more), plus some for health and magicka.
-
Chameleon or Night-Eye potions or gear help with sneaking and seeing in the dark.
-
-
Light Armor or Clothes: Go for stuff like Black Hand Robes or enchanted gear to move quietly.
-
Nocturnal’s Skeleton Key: If you did Nocturnal’s quest, this lockpick never breaks.
Inventory
-
Clear space for the Boots of Springheel Jak and other quest items.
-
Save in a new slot before you start.
Optional
-
Do the quest at night in-game for fewer guards wandering around.
-
If your Sneak is low, grind it by sneaking in busy spots like the Imperial City.
Quest Walkthrough: Step-by-Step
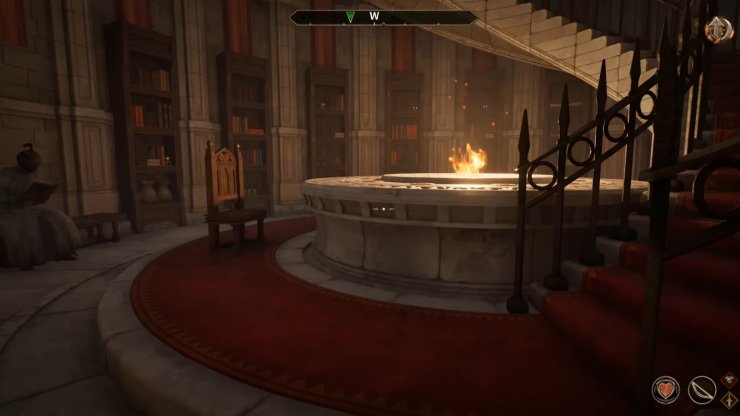
Step 1: Speak to the Gray Fox
-
Location: Ganredhel’s house in Cheydinhal.
-
Objective: Get the quest and gear from the Gray Fox.
-
Details:
-
The Gray Fox lays out the plan: steal an Elder Scroll from the Imperial Palace. He hands over:
-
Boots of Springheel Jak (boosts Acrobatics by 50—use them for jumps if you need to).
-
Arrow of Extrication (you’ll need this later).
-
-
He tells you to activate the Glass of Time in the Palace Arboretum to get started.
-
-
Tip: Only equip the Boots when you need them to keep them in one piece.
Step 2: Activate the Glass of Time
-
Location: Imperial Palace, Arboretum District (southeast corner).
-
Objective: Flip the switch on the Glass of Time to unlock the Old Way.
-
Details:
-
Head to the Arboretum in the Imperial City.
-
Find the Sewer Entrance (a grate marked on your map).
-
Go into the sewer, find the Glass of Time (big glowing crystal), and activate it.
-
-
Tips:
-
The sewers have weak enemies like rats. Clear them if they’re in your way.
-
No guards here, so you don’t need to sneak yet.
-
Save once you’ve activated it.
-
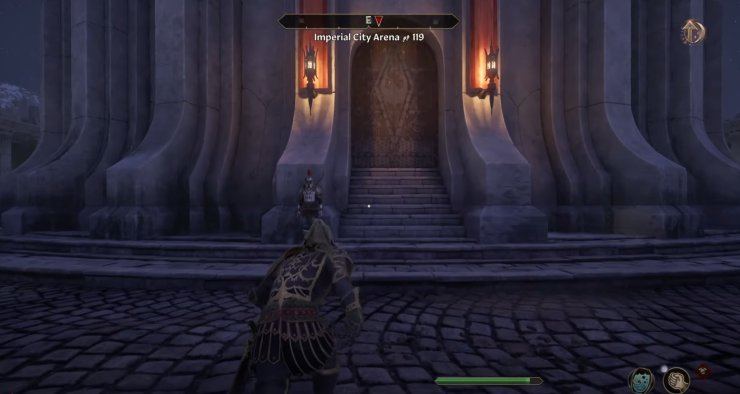
Step 3: Infiltrate the Imperial Palace
-
Location: Imperial Palace, Palace District.
-
Objective: Sneak into the Palace to get to the Elder Scroll.
-
Details:
-
Walk or fast-travel to the Palace District.
-
Enter the Imperial Palace through the main door.
-
Start sneaking right away to dodge the guards.
-
Make your way to the Elder Council Chambers (follow the quest marker).
-
Key Part: You need a key to get in:
-
Option 1: Swipe the Imperial Palace Key off a guard (needs good Sneak or Invisibility).
-
Option 2: Pick the Hard lock on the door (save first; it’s tricky).
-
-
Get into the Elder Council Chambers.
-
-
Tips:
-
Invisibility or Chameleon makes guards way easier to avoid. Stick to shadows.
-
Guards follow set paths—wait for them to turn before moving.
-
Save often. If you get spotted, reload or leg it to reset the guards.
-
Getting caught can mess up the Thieves Guild’s “no killing” rule.
-
Step 4: Access the Old Way
-
Location: Elder Council Chambers.
-
Objective: Find the secret entrance to the Old Way, an Ayleid ruin.
-
Details:
-
In the Chambers, find the central pillar (big column in the middle).
-
Activate it to open a hidden door to the Old Way.
-
Head into the Old Way, a creepy dungeon with Ayleid vibes.
-
-
Tips:
-
There might be a guard or two in the Chambers—sneak or go invisible.
-
Save before entering the Old Way; it’s a rough place.
-
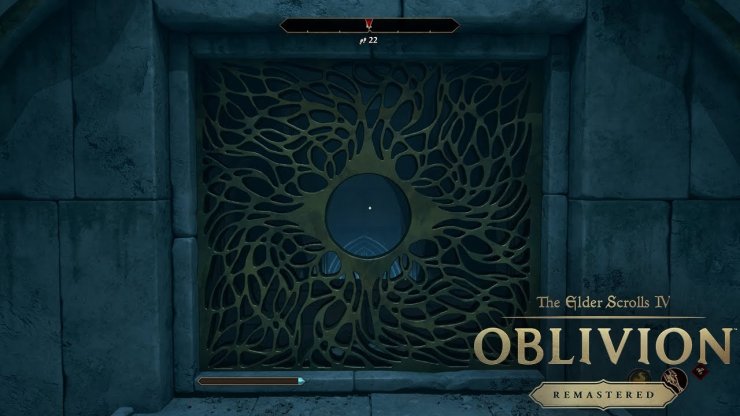
Step 5: Navigate the Old Way
-
Location: Old Way (Ayleid ruin).
-
Objective: Get to the Hall of Epochs for the Arrow of Extrication part.
-
Details:
-
The Old Way is a maze with:
-
Enemies: Undead like skeletons and wraiths, plus traps like pressure plates and blades.
-
Puzzles: Ayleid stuff like push blocks and rotating walls.
-
-
Path:
-
Move through the first room, dealing with undead or sneaking by.
-
Watch for pressure plates—stepping on them sets off traps like arrows.
-
In the next area, find a push block (usually high on a wall, glowing a bit).
-
Hit it to open a door or move a wall.
-
-
Keep going through straightforward paths, dodging traps (use Night-Eye to see better).
-
Reach the Hall of Epochs, a big room with a locked gate.
-
-
Key Part: You’ll need the Arrow of Extrication to open the gate, but you need the right spot to shoot from.
-
-
Tips:
-
Sneak past enemies to save health and gear.
-
Use Restore Health potions if traps or enemies hit you.
-
Save before traps or puzzles—screw-ups can hurt.
-
If you’re low level (under 15), the enemies might be brutal. Level up first if needed.
-
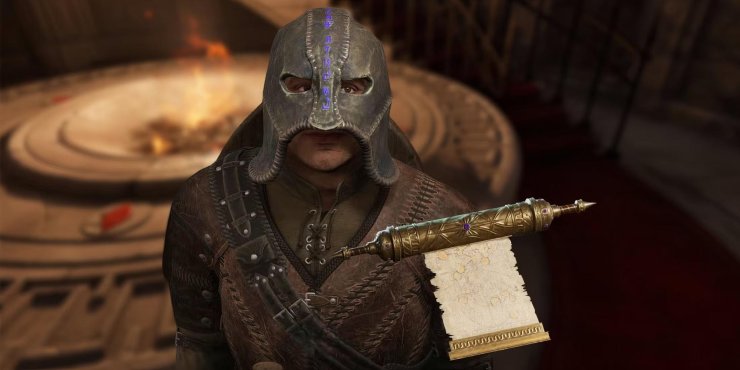
Step 6: Use the Arrow of Extrication
![]()
-
Location: Hall of Epochs, Old Way.
-
Objective: Shoot the Arrow of Extrication into a keyhole to unlock the gate.
-
Details:
-
In the Hall of Epochs, spot a statue with a glowing keyhole (high on the far wall).
-
Find the shooting platform (a ledge across from the keyhole).
-
Equip your 弓 and the Arrow of Extrication (you only get one, so don’t mess up).
-
Line up your shot and fire at the keyhole. If it hits, the gate opens.
-
If you miss, grab the arrow from the floor near the statue and try again.
-
Go through the gate.
-
-
Tips:
-
Save before you shoot. Missing sucks.
-
High Marksman skill helps, or use aim assist if you’re on console.
-
Practice shooting elsewhere if you’re not sure about arrow drop.
-
The keyhole’s tiny—take your time.
-
Step 7: Steal the Elder Scroll
-
Location: Imperial Library, reached through the Old Way.
-
Objective: Grab the Elder Scroll from the Library.
-
Details:
-
After the gate, follow the path to a secret entrance into the Imperial Library.
-
Sneak past Blind Moth Priests (monks guarding the scrolls).
-
Find the Elder Scroll (glowing on a pedestal or table, marked by the quest).
-
Pick it up—no locks or traps, just grab it.
-
-
Tips:
-
The priests are blind but hear noise or feel you bump them. Sneak slowly and steer clear.
-
Invisibility or Chameleon lets you skip the hassle.
-
Save before entering the Library in case you get caught.
-
Step 8: Escape the Imperial Palace
-
Location: Imperial Library to Palace exit.
-
Objective: Get out without getting nabbed.
-
Details:
-
After grabbing the Elder Scroll, a secret passage opens (look for a hidden door or lever).
-
Follow it to the Palace Sewers or another exit path.
-
Move through the sewers (watch for rats or minor enemies) until you hit an outside grate.
-
Exit to the Imperial City.
-
-
Tips:
-
Guards might be on edge—sneak or go invisible to avoid them.
-
Use the Boots of Springheel Jak for jumps in the sewers if your Acrobatics is weak.
-
Save after leaving the Library to avoid redoing the stealth part.
-
Step 9: Deliver the Elder Scroll
-
Location: Gray Fox’s spot (Ganredhel’s house, Cheydinhal).
-
Objective: Give the Elder Scroll to the Gray Fox.
-
Details:
-
Fast-travel to Cheydinhal and head to Ganredhel’s house.
-
Talk to the Gray Fox and hand over the Elder Scroll.
-
He spills his real identity and hooks you up with:
-
Guildmaster Rank in the Thieves Guild.
-
Gray Cowl of Nocturnal (awesome stealth gear).
-
-
The quest wraps up, and you get access to the Thieves Guild hideout in the Imperial City Waterfront.
-
-
Tips:
-
The Gray Cowl gives a huge Sneak boost (+25) and a cool bounty trick (bounty goes to the “Gray Fox,” not you).
-
Save after finishing to lock in your progress.
-
Additional Tips and Troubleshooting
-
Save All the Time: This quest is long and brutal. Save at every big step (after the Glass of Time, before the Old Way, before the arrow shot).
-
Stealth is Everything: Getting spotted by guards or priests can tank the quest. Focus on Sneak and Invisibility.
-
No Killing: Taking out guards, priests, or enemies breaks Thieves Guild rules and can lock you out. Stick to non-lethal moves (sneak, paralyze, or bolt).
-
Arrow of Extrication Glitch: If the arrow doesn’t work, reload and retry. Make sure you’re aiming right at the keyhole.
-
Low-Level Problems: Below level 10, the Old Way’s enemies can wreck you. Level up or bring good gear/potions.
-
Inventory Space: The Elder Scroll doesn’t weigh anything, but make room for the Gray Cowl reward.
Rewards
-
Gray Cowl of Nocturnal: +25 Sneak, +10 Detect Life, +50 Fortify Sneak (gives you a “Gray Fox” alias for bounties).
-
Guildmaster Rank: Unlocks the Thieves Guild hideout, better fences, and guild perks.
-
Boots of Springheel Jak: Keep them if you don’t use them in the escape (your call).
-
Story Payoff: The quest spills the Gray Fox’s secrets and wraps up the Thieves Guild arc.


Comments