Table of Contents
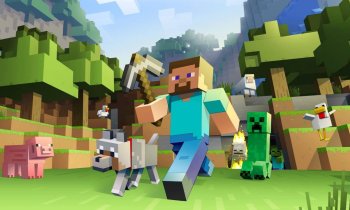
Minecraft, a well-established and highly acclaimed PC game, has seen ongoing transformation through the dedicated work of its creators. Over the years, players have actively contributed their ideas and creations, bolstering the game's flexibility and appeal.
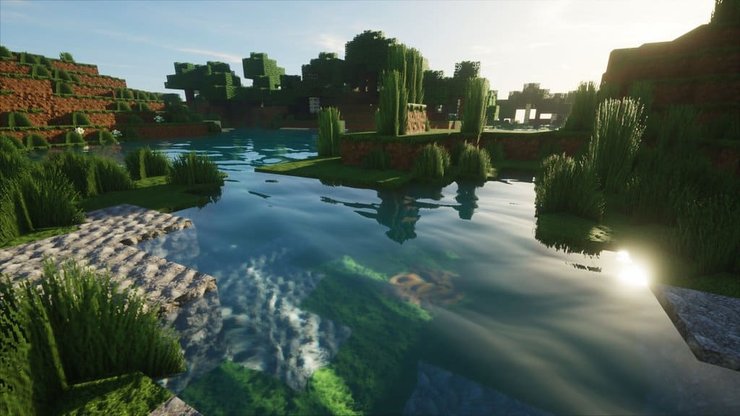
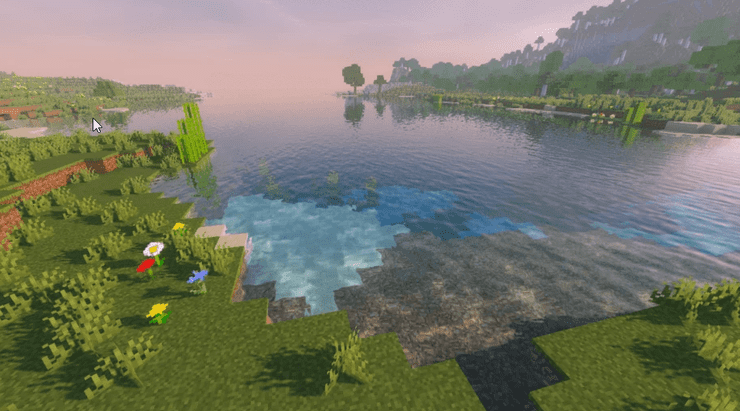
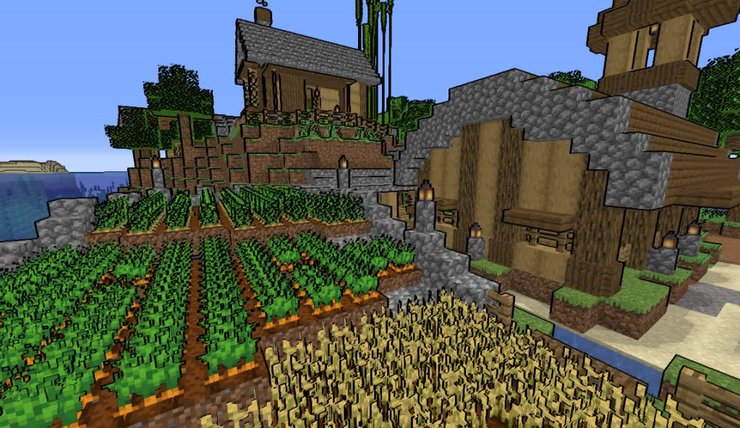
An intriguing aspect of the game's enhancements is found in the domain of "shaders," which possess the remarkable capacity to transform the game's inherently blocky landscapes into a visually enchanting blend of realism and whimsy. With a plethora of shader options available, we've thoroughly explored the most acclaimed ones to present our top recommendations for your consideration. Furthermore, we'll provide step-by-step guidance on how to get shaders in Minecraft and install them in your Minecraft experience.
How to Install Shaders on Minecraft 1.20?
Shaders don't come automatically in Minecraft Java Edition. To integrate shaders into your Minecraft experience, a bit of additional effort is required, but it's not overly challenging. The key components you'll need are OptiFine, responsible for managing the technical aspects, and Shader Packs, which harmonize everything seamlessly.
Update Minecraft
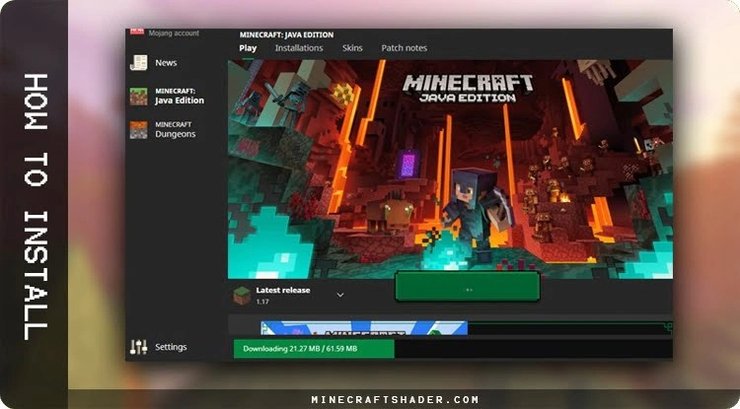
- To get started, update Minecraft first. Open the Minecraft Launcher and look at the menu in the bottom-left corner. If it doesn't say "1.19.3", select version 1.19.3, then click "Play." It will download the newest version, which is 1.19.3 in this case.
- Once the download is finished, the game will start on its own. Close it and move on to the next step.
Install OptiFine
- Visit OptiFine download page. Please note that OptiFine requires Java, so download and install it before running OptiFine installer.
- Install the OptiFine installer.
- When it's done, click "OK" to continue.
Run Minecraft with Optifine
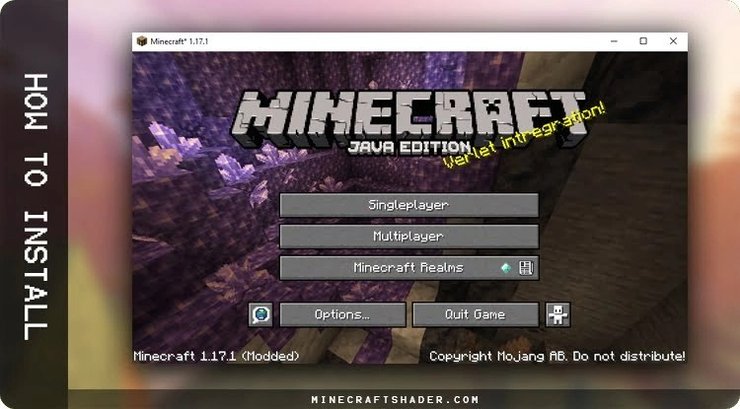
- Open the Minecraft Launcher. From the drop-down menu, pick the profile that OptiFine created, and then click on "Play."
- When Minecraft starts up, you'll notice that it says "Modded" next to the version name, showing that OptiFine has been installed correctly.
How To Get Shaders in Minecraft
Download Shaders for Minecraft
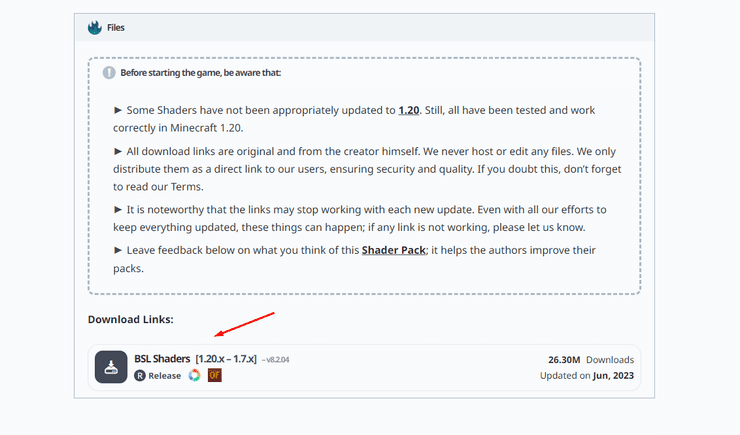
To get Shaders in Minecraft, pick one you like. In this guide, we recommend the BSL Shader. Go to the "Download Links" part and start the download process.
Install Shaders to Minecraft
1. While Minecraft is still running on the main screen, follow these steps: Go to "Options" > Click on "Video Settings" > Select "Shaders"
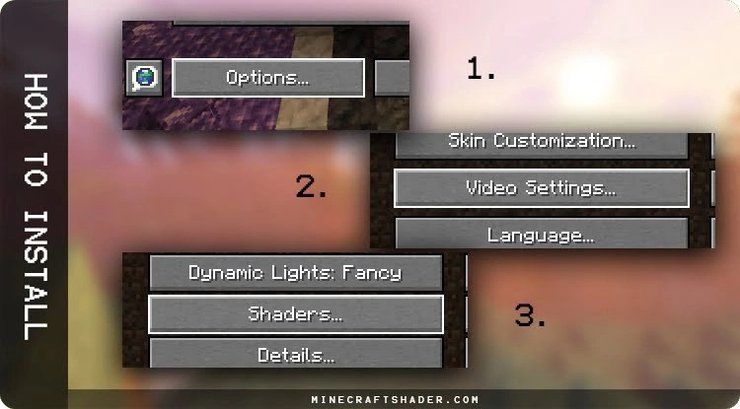
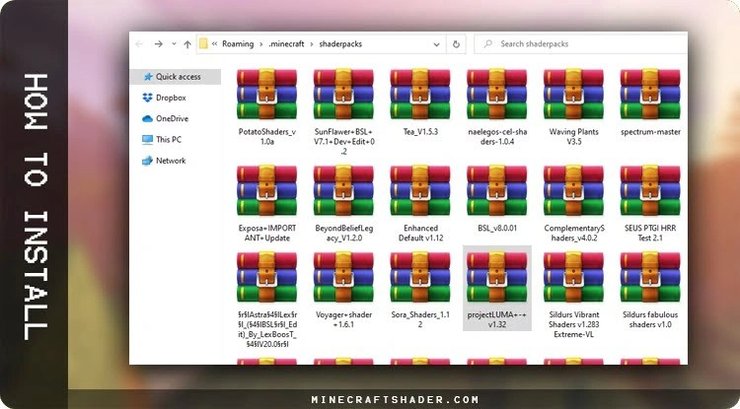
2. You'll find a window with all the game settings for Shaders. In the lower-left corner, click on "Shaders Folder."
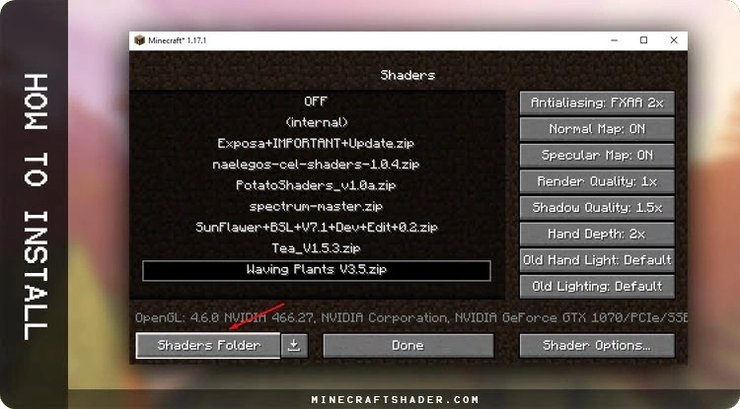
3. Move all the Shaders you want to use in Minecraft into this folder.
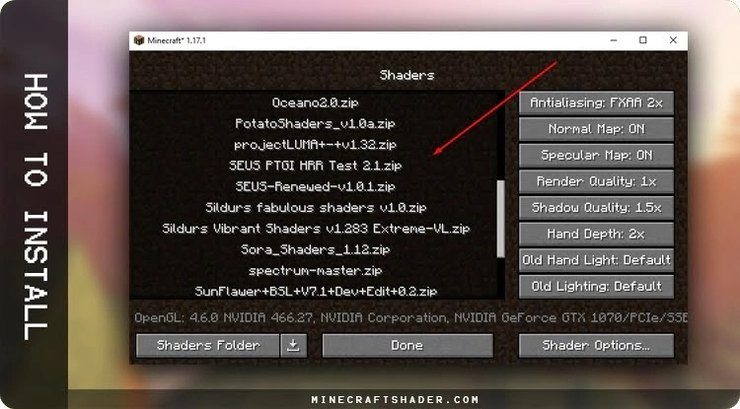
4. Pick one from the list and click "Done." And you are now ready to play with Shaders.
How to Install Shaders in Old Minecraft Versions
To get Shaders for older Minecraft versions, things work a bit differently because OptiFine only became compatible with Shaders from version 1.8.8 onwards. So, in this case, you'll need Forge and ShadersMod, which was created by Karyonix.
First, select the version you want to play. ShadersMod has specific requirements when it comes to Forge. Let's check out:
Install Shaders 1.8 and Newer
Compatible with Forge 1487 to 1521. Not compatible with Forge 1523 or later.
Compatible with OptiFine_1.8.0_HD_U_D5 – (AA OFF. AF OFF, Fast Render OFF, Natural Texture OFF)
Compatible with Forge 1481-1566
Compatible with OptiFine_1.7.10_HD_U_C1 (only ultra edition)
Compatible with Forge Latest
Compatible with OptiFine_1.7.2_HD_U_D3. (only ultra edition)
Compatible with Forge Latest
Compatible with OptiFine_1.6.4_HD_U_D1 (only ultra edition)
Install Shaders 1.8 and Earlier
- Just like in the previous process, the first thing you need to do is update Minecraft to the version where you want to install shaders.
- Open the Minecraft Launcher. Up at the top, click on "Installations" and then choose "New installation."
- In the "Version" section, pick the version you want to use, and then click on "Create."
- In the profile you made, click "Play." This will start the download. Wait for it to finish. Once the game opens, close it. Keep in mind that a pop-up will show up, telling you that the version you're using doesn't have the latest security features. This is a standard message and doesn't pose any risk, so you can go ahead and approve it.
- Go to the Forge download page to download Forge.
- Now, open the Forge Installer. When the window pops up, click "OK" and wait for Forge to install.
- Once the installation is complete, a pop-up message will confirm that Forge has been successfully installed. Click "OK" to continue.
- Open the Minecraft Launcher, and from the dropdown menu, ensure that the Forge option is chosen. Then, press the "Play" button.
- After the game finishes loading, check if you see the "Mods" option. This is where you will find a list of all the mods you've installed.
- Now that we've completed this step, let's move the Shaders into the game. To do this, you'll need to access the game folders. Open the Windows Run dialog by pressing Win + R and then type: %appdata%.minecraft\mods.
- Move the ShadersModCore-v2.3.31-mc1.7.10-f file (or the one corresponding to the version you're playing) that you downloaded into this folder.
- Now, reopen the Minecraft Launcher and start the game using the Forge profile.
- To confirm that Shaders are working in Minecraft, go to: "Options" > "Shaders". You should see a window that looks like this.
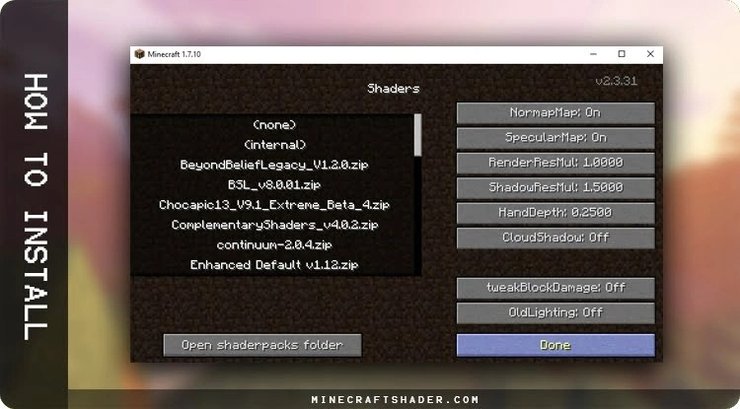
- If you want to add Shaderpacks to Minecraft, go back to the step labeled "How To Get Shaders in Minecraft" in the instructions.
By following all these steps, you should have Shaders installed correctly in your Minecraft. We recommend watching a tutorial on how to use Shaders in Minecraft for optimal performance.
Best Shaders in Minecraft 2023
Looking for some awesome shaders to enhance your Minecraft experience? Check out our top picks, spanning from atmospheric and mysterious to vivid and lively.
1. Sonic Ether’s Unbelievable Shaders
If you've dabbled in Minecraft shaders, you've probably come across Sonic Ether's Unbelievable Shaders, known as SEUS. SEUS was among the first shaders to make waves in the Minecraft modding world, and it has stayed a top choice for a reason. SEUS is all about lifelike lighting, emphasizing subtle enhancements rather than the bold colors and contrasts seen in some other shaders. There's even an experimental version that works with ray tracing on Nvidia graphics cards, along with another version designed to be less demanding on your computer's performance.
2. Continuum Shaders
If you're in search of photorealistic shaders for Minecraft, look no further than Continuum Shaders. They stand out as the cream of the crop, incorporating a wide range of top-tier visual enhancements into a single mod, all while maintaining a delicate balance. It doesn't just bombard you with a mishmash of eye-catching effects. Continuum offers crystal-clear water, lifelike fog and clouds, astonishing shadows, and vivid yet realistic colors. It does everything right, showcasing how astonishing Minecraft can appear in perfect conditions.
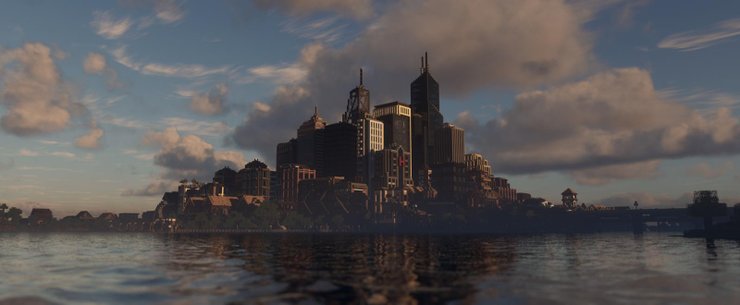
Nonetheless, there's a caveat, as there often is with such modifications. Continuum stands out as one of the most demanding in terms of system resources, rendering it primarily suitable for high-end machines. But if your setup can handle it, there's even a fully ray-traced version of Continuum and a specially crafted high-resolution texture pack tailored for use with these shaders.
3. BSL Shaders
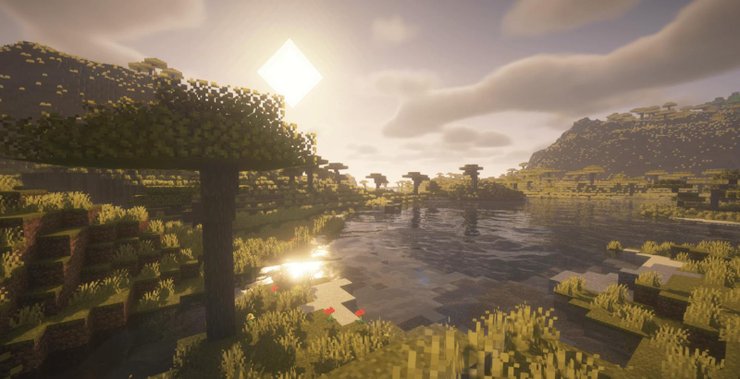
If you crave ultra-realistic graphics in Minecraft but your computer can't handle Continuum, consider giving BSL Shaders a try. Much like Continuum, BSL Shaders offer a comprehensive package, introducing features like depth of field, volumetric lighting, bloom, and practically every other fancy visual effect imaginable to completely transform Minecraft's appearance. BSL Shaders stand as a remarkable choice for several compelling reasons, but their standout feature is their exceptional performance optimization. This means that even on less potent computers, you can relish one of the most visually captivating renditions of Minecraft available.
In essence, BSL Shaders are so remarkable that they could easily become the shader of choice for a vast majority of players.
4. Sildur’s Vibrant Shaders
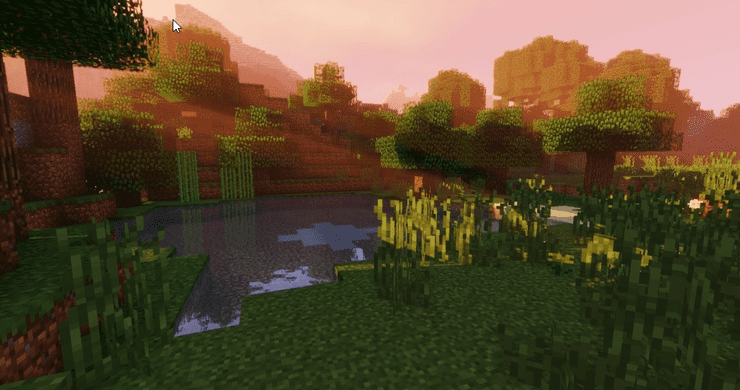
While many top Minecraft shaders strive for a natural appearance that enhances the game's visual style without a complete overhaul, Sildur's Vibrant Shaders takes a different approach. It amps up Minecraft with a plethora of stunning effects to the point where it almost appears to be a different game entirely. Sildur's Vibrant Shaders distinguishes itself as one of the most immersive graphics enhancements for Minecraft, characterized by its vivid lighting and saturated colors. Nevertheless, its intensity may not suit everyone's taste. However, for those who admire the concept but desire a more tailored experience, it provides extensive configurability options.
5. KUDA Shaders
KUDA Shaders is another highly favored option among Minecraft players, known for its predominantly realistic visual style. It excels in a couple of key areas. This shader enhances Minecraft's colors with a noticeable yet not excessive boost, creates more striking shadows, and provides impressive water reflections, although some other shaders might outperform it in this regard. However, where KUDA Shaders truly stands out is in the sky department. It boasts incredible cloud and atmospheric effects that make everything from sunrise to the full moon look absolutely breathtaking, an area where only a few mods can rival its impact
6. ProjectLUMA Shaders
If you've noticed some similarities between ProjectLUMA and the previous entry, KUDA Shaders, there's a valid explanation. ProjectLUMA is actually the official successor to KUDA Shaders, created by the same developer. As a result, the mod shares a similar aesthetic. Its primary goal is to deliver the best-looking game while imposing minimal performance impact and avoiding excessive visual effects. It's safe to say that ProjectLUMA succeeds on all fronts, providing an astonishingly good-looking game, complete with KUDA Shader's signature skies, without significantly compromising performance.
7. Nostalgia Shaders
The Nostalgia Shader offers Minecraft a distinct and unique style rather than striving for a realistic appearance. It accomplishes this by accentuating Minecraft's iconic blocky look and emulating shaders commonly used in gaming from a decade ago. Since Minecraft has a very particular visual style, adding mods can sometimes be challenging. That's where the Nostalgia Shader comes in handy. It allows you to subtly tweak your game's appearance without completely overhauling it. Additionally, it's compatible with most machines because it doesn't demand top-notch hardware for optimal quality.
8. Chocapic13's Shaders
While many shaders aim for a more realistic Minecraft world, Chocapic13 achieves realism through subtle adjustments to lighting, shadows, clouds, and fog. This mod is particularly favored by other modders due to its high degree of customization. Even if you're not a modder, the straightforward option to adjust quality according to your PC's performance is a fantastic feature to ensure smooth gameplay without frame drops.
9. Naelego’s Cel Shaders
Naelego's Cel Shaders mod stands apart from the rest on this list because it doesn't simply tweak Minecraft's appearance; it transforms it into an entirely different game. Rather than merely enhancing Minecraft's visuals, it introduces cel-shaded effects featuring bold, animated outlines around every element of the game, similar to the art style of Borderlands. You might not always want to play Minecraft with Naelego's Cel Shaders, but its distinctive and genuinely unique look makes it a great addition to have on hand for those moments when you're in the mood for something different and visually captivating.
>>> Read more: Top 10 Best Low End Shaders For Minecraft Java 2023


Comments