Minecraft is an exciting 3D block-building game that features various MODs, game types, and servers. With 126 million players playing Minecraft in 2021, the game achieved the highest number of active players since its initial release.
Players can play single-player or multiplayer using a Minecraft public server or private server. Playing Minecraft on a private server offers a different gaming experience and more benefits than on a public server. So, if you plan to play it that way, you’ll need to set up a Minecraft server.
This article will guide you through creating your own Minecraft server in eight easy steps. You will also learn all about Minecraft servers and the benefits of having one.
What Are Minecraft Servers?
Minecraft Servers let the players play with other users via a local area network (LAN) or online. Minecraft has two server types known as Servers and Dedicated servers.
Servers are hosted by partners in the Minecraft community. Mojang first implemented multiplayer mode on May 31, 2009, during the Classic update. Then, MinecraftOnline, the oldest server featuring a map called “Freedonia,” was added to the game on August 4, 2010. Until now, only Minecraft: Bedrock has six featured servers:
- The Hive
- Lifeboat
- Cubecraft
- Mineville
- Mineplex
- Galaxite
Meanwhile, individuals or Minecraft hosting services host dedicated servers. For example, Minecraft Realms is an official dedicated hosting service released in 2013. Though, it requires a subscription to use.
The Java and Bedrock editions feature Minecraft Realms. However, only the Bedrock edition offers two plans, Realms and Realms Plus. The plan costs $3.99/month to $7.99/month and includes 24/7 playtime with ten players and a cross-platform play on the Bedrock edition.
Minecraft also provides an official free server for those who want to create their server without subscribing to any Minecraft hosting services. This server, however, is only compatible with Minecraft: Java.
Benefits of Having Your Own Minecraft Server
Having a dedicated server is recommended if you want the freedom of building your Minecraft world in single-player or multiplayer. Also, it gives you other benefits as follows.
Security and Privacy
You have total control over the server, meaning you are free to limit players taking part in the game. You may want to invite your close friends or even random people. Plus, if you have kids who play Minecraft, running a dedicated server can also help to supervise them.
Modification and Upgrades
Paid Minecraft servers give you an option to modify and upgrade your server. If you have a subscription, you can upgrade it for money. A free server, however, requires hardware upgrades on your machine.
Your World, Your Rules
You have endless opportunities when it comes to creating and customizing your Minecraft world. Also, you can implement your own rules to the game, creating an ideal gaming experience.
Online 24/7
This benefit only applies to paid Minecraft servers subscribers. These servers support non-stop playtime, so you don’t need to worry about keeping your computer awake all the time. Your friends can also play on the server even if you are not online.
How To Set Up Your Minecraft Server
Subscribing to a Minecraft hosting service and installing a free official Minecraft server is the easiest way to set up. Alternatively, you can consider other free Minecraft servers, such as Skynode, Tynker, BisectHosting, and ScalaCube.
Before installing the official server, it is important to consider these tips:
- The free Minecraft server is only available in Java edition.
- Your machine should meet the requirement of at least 4GB of RAM and plentiful internet bandwidth.
- A wired internet connection is recommended to get a stable connection.
Here are the steps for installing your dedicated server on Windows.
1. Install Java
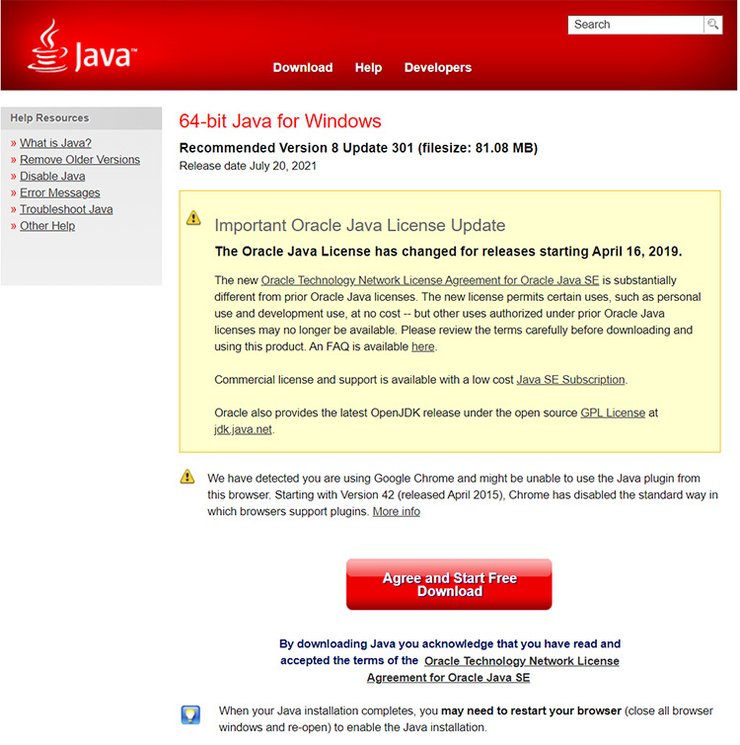
Download and install the latest version of Java on your machine. Java is the core tool for creating the server, so make sure you keep the version updated.
Here are the steps of installing Java:
- Open the default download location in the Downloads
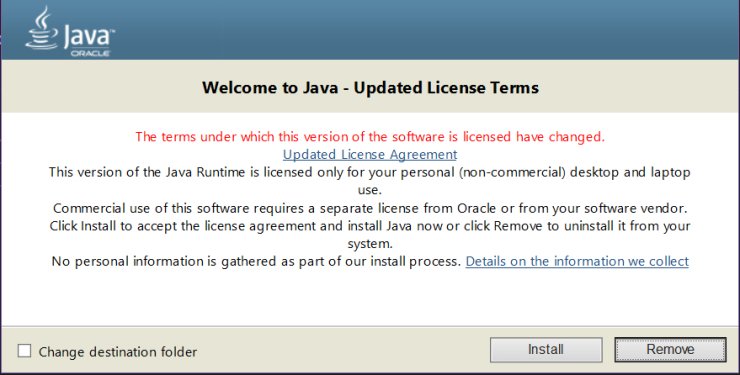
- Open the Installer - it is called jre-8u301-windows-x64 - then click Install
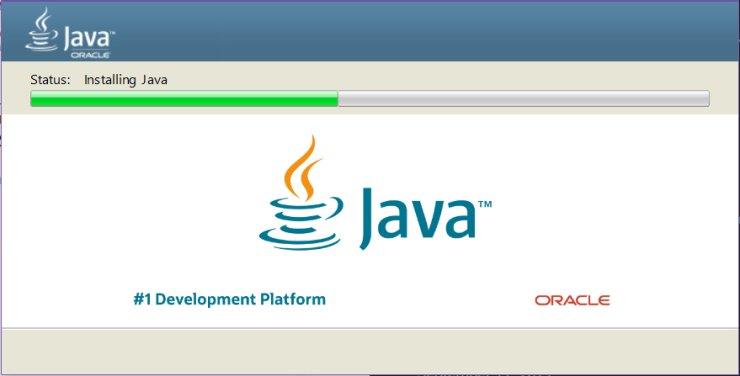
- Wait until the installation is complete.
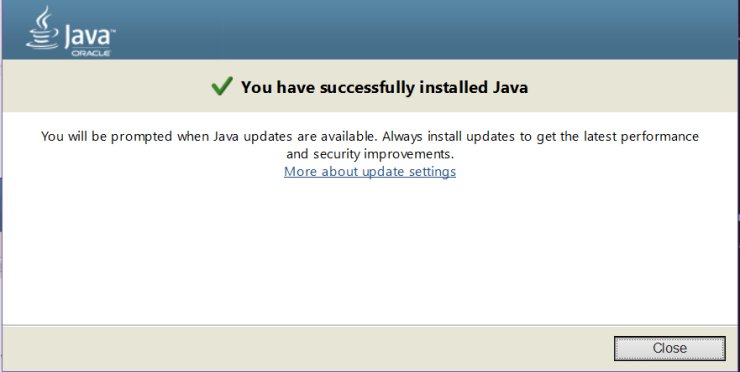
- There will be a confirmation message if it’s completely installed. Then, click Close to finish the installation.
- Restart your computer, then check the Java version by entering the command java -version in Command Prompt. The result will show the latest Java version you just installed.
2. Download the Official Minecraft Server
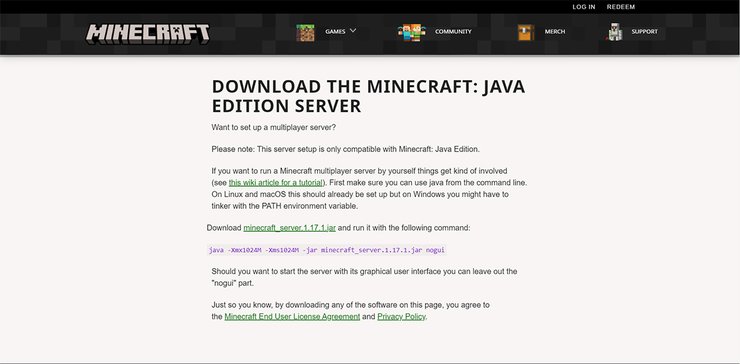
Download The Minecraft: Java Edition Server from Minecraft’s official website. After that, create a new folder for the .jar file and move the downloaded file to the folder, which will store the world and configuration files.
3. Create and Run the Script
Creating a script to run the .jar file is necessary in order to host the server. Here is how to do that:
- Open a text editor and copy the command java -Xmx1024M -Xms1024M -jar minecraft_server.1.16.4.jar nogui into it. The -Xmx and -Xms allocates how much memory is used for the server.
- Save the file as bat on Desktop or your preferred location. Make sure to erase the .txt extension to make the script executable.
- Run the script by double-clicking the bat.
5. Accept EULA
The script will generate a new file called eula.txt. Open the file in a text editor and change the value eula=false to eula=true. Then, save the file. Accepting the end-user license agreement (EULA) is important because you cannot run the server if it’s not configured.
6. Test the Server
Execute the Run.bat again and wait until all the configuration files are generated in the server folder. Once it’s set up, test whether the server works by following the steps below:
- Open Minecraft and enter multiplayer mode.
- Type localhost on the server address bar and click Connect.
- Wait until you are connected to the server. You will see a confirmation message if it is successfully connected.
8. Port Forwarding Your Local Network
Port forwarding means connecting your router to the Minecraft port, which helps other users connect to your server. However, the process may differ depending on what router you have. Implement these steps to do port forwarding:
- Find the router you are using in this list.
- If your router is listed, click on it and follow the instructions. For example, if you have a TP-Link router, here is the guide to do port forwarding.
7. Find External IP Addresses
To play multiplayer on your server, make the server available to your friends. Find your external IP addresses by following these steps:
- Open Command Prompt.
- Type ipconfig and press Enter.
- You will see your IPv4 and IPv6 addresses under Wireless Lan adapter Wi-Fi.
- Save the IP addresses and proceed to the next step.
8. Connect to Your Minecraft Server
Invite your party to have fun in your Minecraft world once the server is up and running. Here are the steps to follow:
- Open Minecraft, then click Multiplayer.
- After that, click Add Server.
- Enter the server name - it can be anything you want.
- Then, enter the server address - your IP address followed by a port number. Here is an example of entering the server address usingIPv6 address:
[ab00:0000:000b:c000:bc0:0ab0:0000:0000]:25565
- Click Wait until it is connected, then click Join Server.
- Share your external IPv6 address with your friends and let them join the fun.
Congratulations, you have successfully hosted your own Minecraft server. Explore the endless fun building and modifying your Minecraft world with friends.
Conclusion
To wrap up, playing Minecraft on a dedicated server gives you a more engaging and exciting gaming experience. Also, if you subscribe to a Minecraft hosting server, it will stay online 24/7 and give you options to modify and upgrade the server to your liking.
Implement what you have learned to create a beautiful and fantastic Minecraft server. Good luck!
>>> You might be interested in: Minecraft Live 2021: When It Will Happen And What We Can Expect


Comments