The Cayo Perico Heist is the single highest-paying job in all of Grand Theft Auto Online. Today, we will provide you with a step-by-step Cayo Perico Heist Guide to help you complete this challenging mission alone!
Table of Contents
- #1 The Cayo Perico Heist Guide Overview
- #2 How to Unlock the Cayo Perico Heist
- #3 The Cayo Perico Heist Guide: Meeting Madrazo
- #4 The Cayo Perico Heist Guide: Buying the Kosatka
- #5 The Cayo Perico Heist Guide: Heist Intel
- #6 The Cayo Perico Heist Guide: Heist Prep - Approach Vehicles
- #7 The Cayo Perico Heist Guide: Heist Prep - Equipment
- #8 The Cayo Perico Heist Guide: Heist Prep - Weapon Loadout
- #9 The Cayo Perico Heist Guide: Heist Finale
#1 The Cayo Perico Heist Guide Overview
Players: 1 -4
Phases: Heist Prep, Setup, and Finale Mission
An infamous drug lord - El Rubio stole sensitive documents from the Madrazo crime family. He is attempting to blackmail them with the information he has. In their effort to retrieve the documents, the Madrazos have enlisted your aid. You will join a Russian submarine operator by the name of Pavel on a mission to infiltrate Cayo Perico and extract the files.
This is the first time Rockstar Games designed a Heist that players can complete solo. But it never hurts to ask some friends to come along.
Cayo Perico Heist Payout
- Minimum Payout: $1,078,000 (Minus $22,000 for Pavel)
- Maximum Payout: $4,570,600
Cayo Perico Heist Bonuses:
- Complete the Cayo Perico Heist for the first time: $100,000
- Solo Completion: $100,000
- Complete with 4 players: $100,000
- Use all different vehicles to approach the Cayo Perico Heist: $250,000
- Take all variations of the primary target: $150,000
- Complete the heist without alerting the guards: $200,000
- Finish the elite challenge: $200,000
- Complete the heist on hard and not die: $200,000

Total: $5,870,000 (Highest In GTA Online)
#2 How to Unlock the Cayo Perico Heist
In order to start the Cayo Perico Heist, you’ll need a few things first. The number one requirement is that you have to be a VIP, CEO, or Motorcycle Club (MC) President. Open the SecuroServ section in the Interaction Menu to register for these positions.
Secondly, you will need to own a Penthouse at the Diamond Casino and Resort. It gives you access to The Music Locker club in the basement of the resort.

To buy a Penthouse, head to the customer service desk at the Diamond Casino. There's a terminal on the far left side of the desk where you can find the Penthouse computer. Use it to purchase a Penthouse.
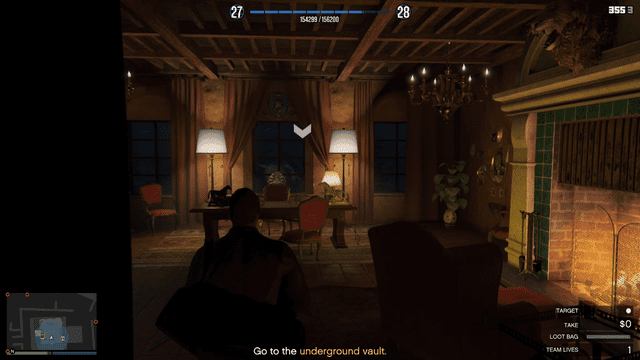
#3 The Cayo Perico Heist Guide: Meeting Madrazo
Miguel Madrazo is a member of the Madrazo family who will ask you to infiltrate Cayo Perico. He will task you with the mission to extract the documents.
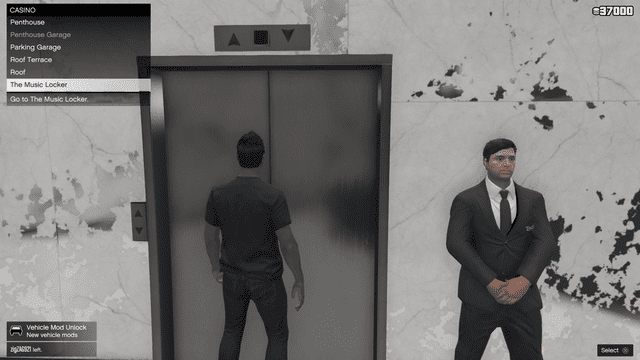
From the customer service desk at The Diamond Casino, turn around and take the elevator down to The Music Locker. Once you reach the bottom, exit the elevator and head down the spiral staircase. Take the door on the left to enter the club.
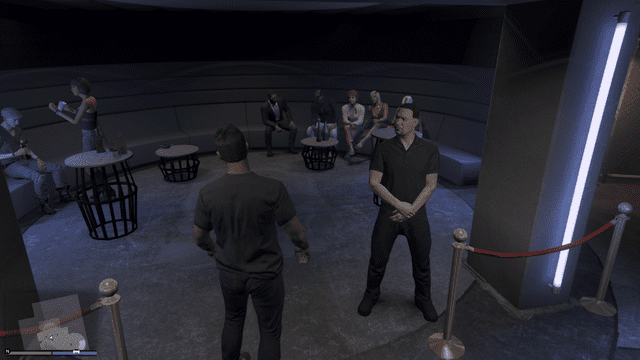
Once you are inside, make your way through the dance floor and head to the VIP section on the left to initiate a short cutscene.
After meeting Miguel Madrazo, who will ask you to infiltrate Cayo Perico and take back some sensitive files the drug lord “El Rubio” has in his possession, leave the casino.
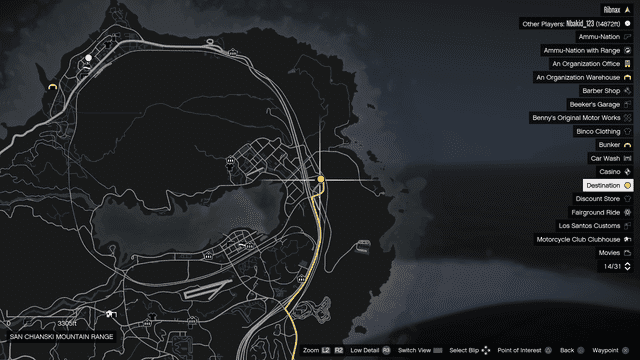
#4 The Cayo Perico Heist Guide: Buying the Kosatka
Open your phone menu (Triangle/Y) and head to the Internet app, then go to Warstock Cache & Carry. The top option should be the “Kosatka” submarine, which you’ll need to purchase to proceed.

Once you’ve bought the Kosatka, you’ll have access to your new contact, and submarine operator, Pavel.

Open the Interaction Menu (hold down Touchpad/View button for several seconds) and select Services, then go to Kosatka and request the vehicle. If you are close to the coast, it will surface nearby.
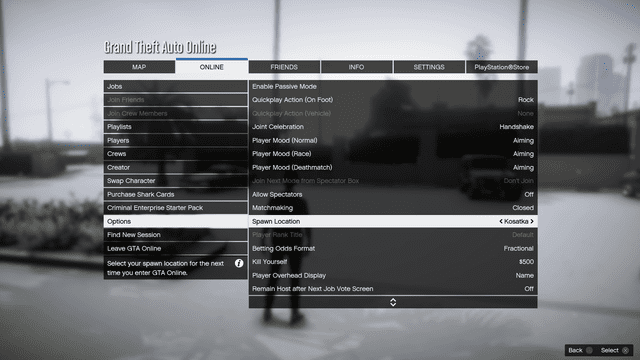
NOTE: You can also set the Kosatka as your spawn location, which can save a ton of time by logging out and logging back in.
Next, use the same menu to Request A Dinghy, which will spawn a boat near your location.
Climb aboard and ride out to the Kosatka, then climb on top and find a hatch, then head inside to meet Pavel. After a short cutscene, you’ll gain access to the bridge.
#5 The Cayo Perico Heist Guide: Heist Intel
This is the first step of the heist prep.
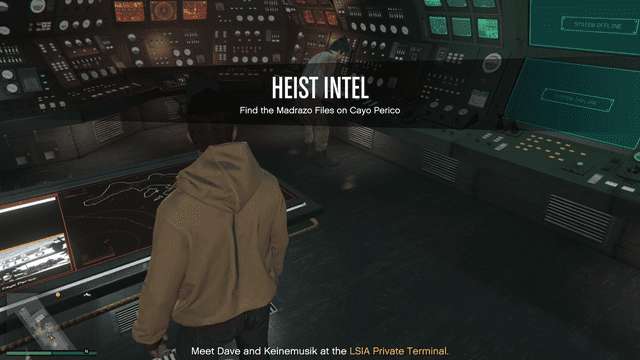
After you select the first leg of the Heist from the terminal, meet with Dave and Keinemusik at the LSIA Private Terminal in southern Los Santos.
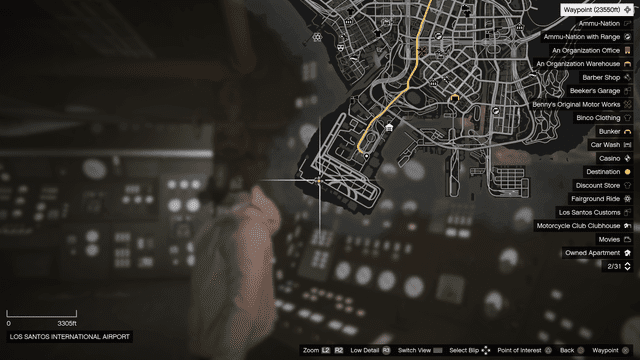
Spawn a dinghy and use it to get back to land. Drive to the southeastern gate of the airport, then find the private hangar across the runway.

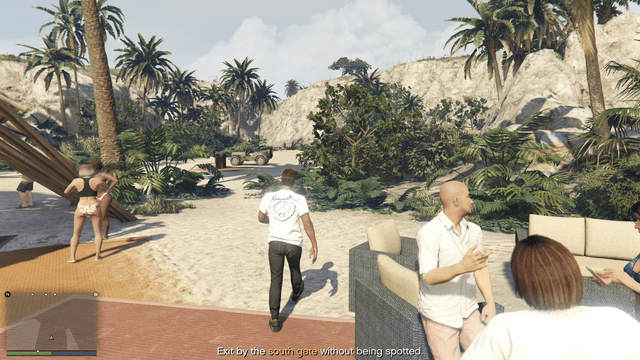
Approach it to initiate the cutscene. Once the scene completes, you’ll be on the island with El Rubio.
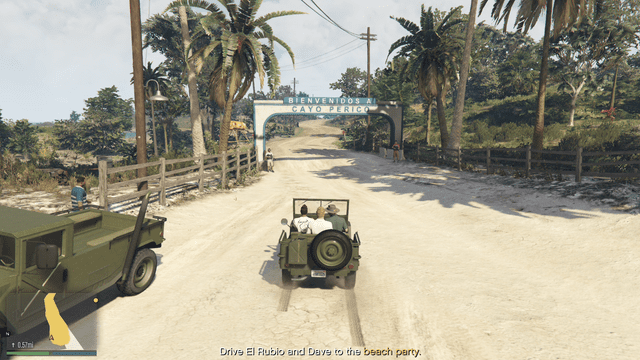
Drive your host to his compound, then sneak away after the show starts.
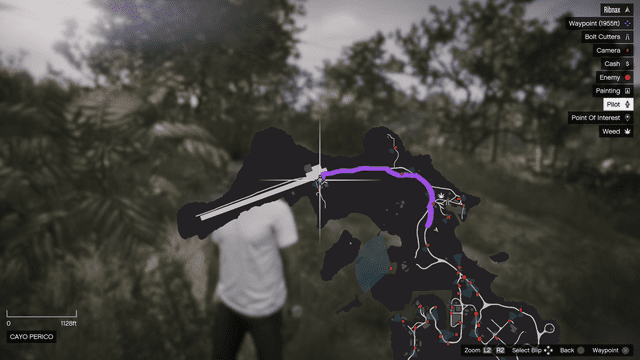
Here you have two options. One, turn left and find a boat to go to the other side of the island a bit faster. Or two, take the right and penetrate the island’s defenses on foot.
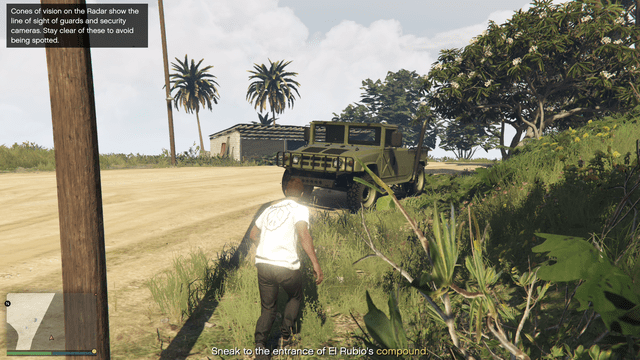
Stay alert for cameras and guards as you reach the outside of El Rubio’s compound.
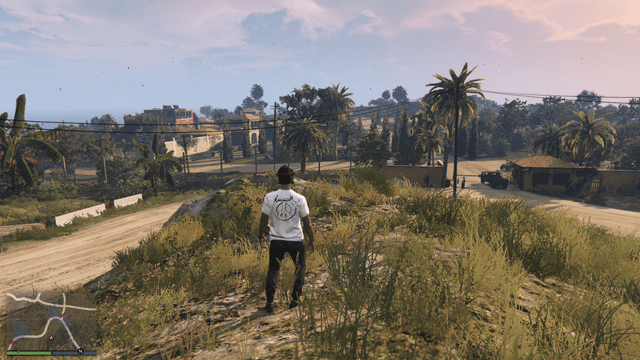
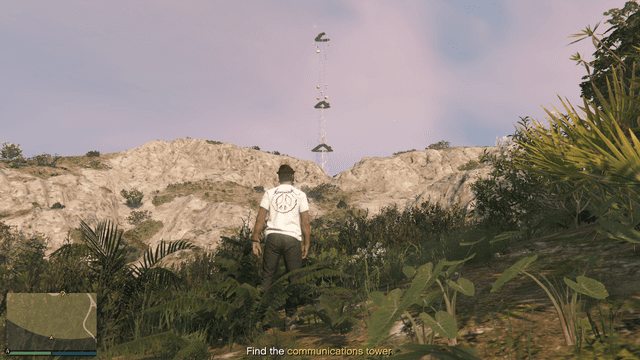
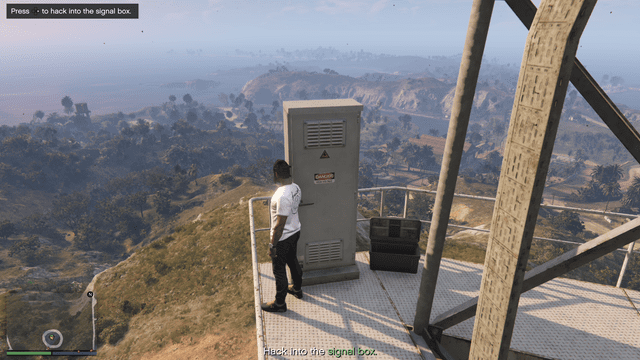
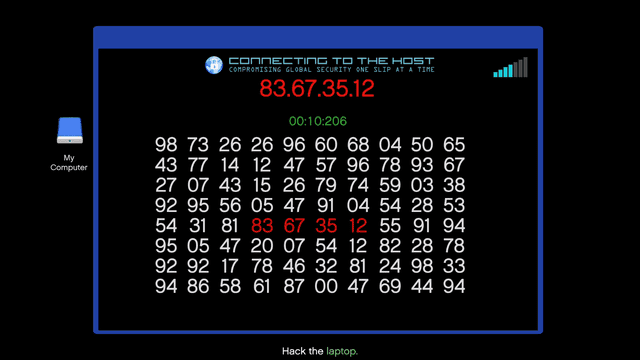
Here, Pavel will call and inform you about a communications tower that you can use to hack into the CCTVs and find the vault.
Carefully go to the tower, head through the gate, and climb the ladder to get on the upper platform. You will find the box on your right, solve the puzzle to hack it, and gain access.
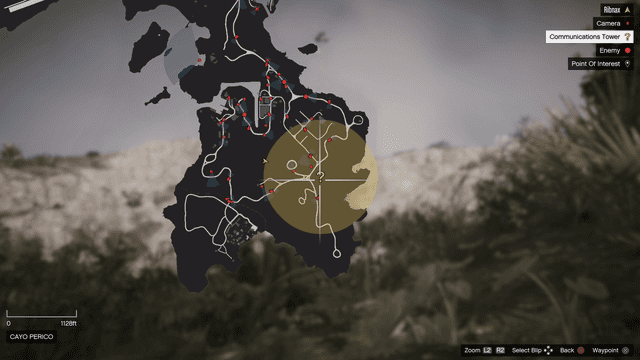
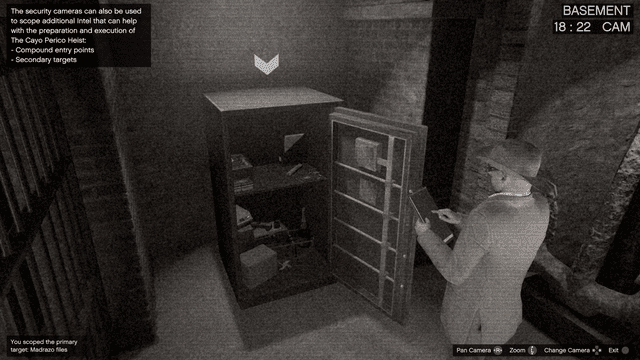
Cycle through the camera feed until you find the one in the Basement, turn it to the left to get a view of the safe.
Next, cycle the cameras again until you find Office - Cam 1 feed, which surveils El Rubio’s office. Take a look at the fingerprint lock on an elevator leading to the basement. It's the last piece of intel you need to complete this leg of the Heist.

Check other cameras to find additional rewards like cash and weapons. Leave when you're ready.
Once you have a good scope of the compound, go down to the North Dock to continue. Here, take a picture of the water for Pavel by pressing the Square or X button.

After that, investigate the surrounding warehouses and locate things you can steal during the Heist. Take pictures and send them back to Pavel.
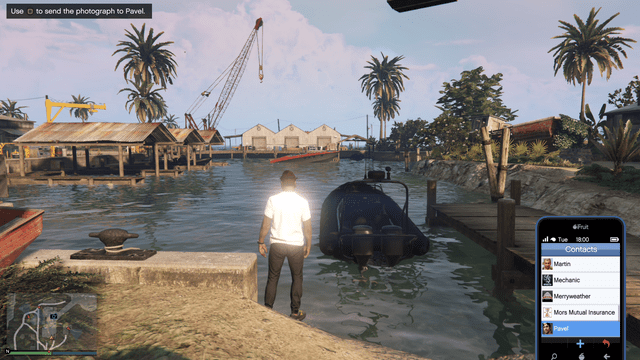
Lastly, you’ll need some Bolt Cutters. There are some sitting on a ledge near the water from the first warehouse. Take a picture of them and send it to Pavel.

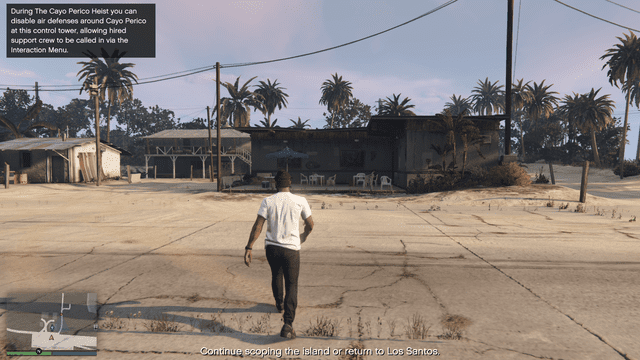
At this point, there are two choices you can make. Either continue scouting the island for additional valuables, or head back to begin the next phase of the Heist. By now you have already gathered all the essentials. Head back to the airfield when you feel like it.
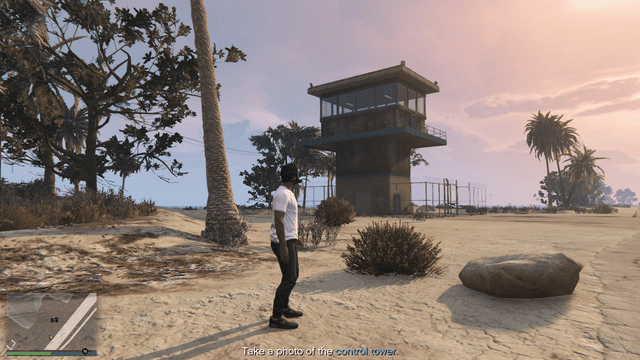
At the airfield runway, Pavel will come on the radio and ask you to take a photo of the control tower. Head down the runway to take the shot, then send it to him. Once that’s done, go back to the main building off the runway, and ask the pilot to take you back to Los Santos.
Venture back to the Kosatka to start the next phase at the planning board.
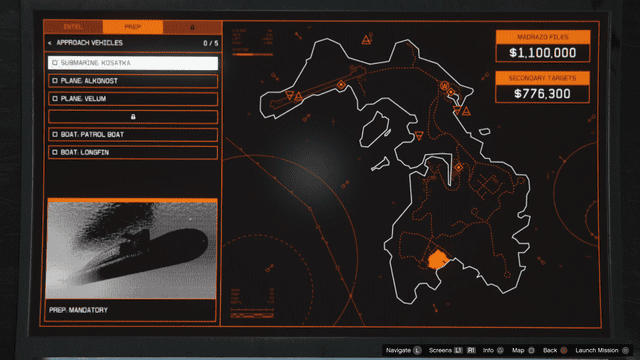
#6 The Cayo Perico Heist Guide: Heist Prep - Approach Vehicles
The next section of the Heist starts with a Heist Prep Mission. It will vary depending on the type of vehicle you use to infiltrate Cayo Perico.
The available options are:
- Kosatka Submarine
- Alkonost Plane
- Velum Plane
- Stealth Annihilator Boat
- Patrol Boat
- Longfin Boat
Heist Prep - Kosatka Submarine
As we have already purchased the Kosatka submarine for the Heist, let's go with it as our approach. Head to the highlighted section of the Los Santos's water in the Kosatka, where we’ll extract a sonar scrambler from the Merryweather Test Site.
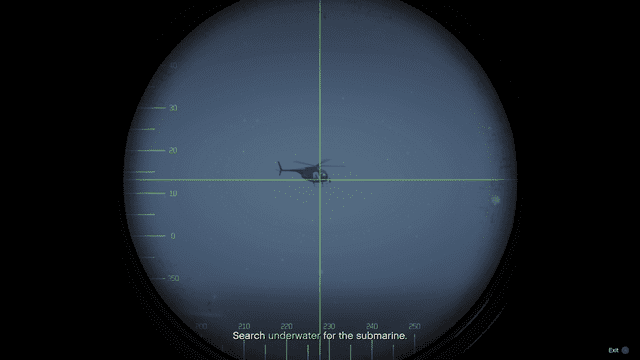
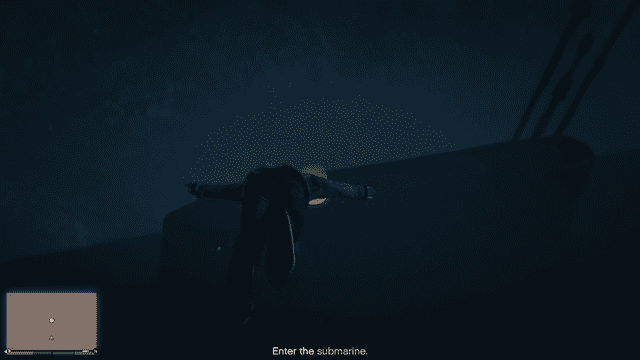
Use your Periscope to lock on targets and fire missiles to destroy the boats and helicopter near the Merryweather Test Site. Then jump into the water for a dive. Enter the submarine from the glowing yellow hatch door.
Before enter combats, equip some Body Armor and a close-range weapon like a Shotgun or SMG for fighting in tight space. Check every corner as you move to the control bridge. Enemies may hide around and shoot you.
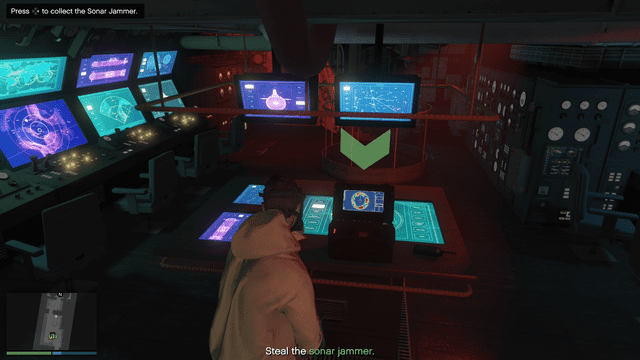
Take out the crew at the bridge, grab the package, head back out and board the Kosatka to complete the mission.
#7 The Cayo Perico Heist Guide: Heist Prep - Equipment
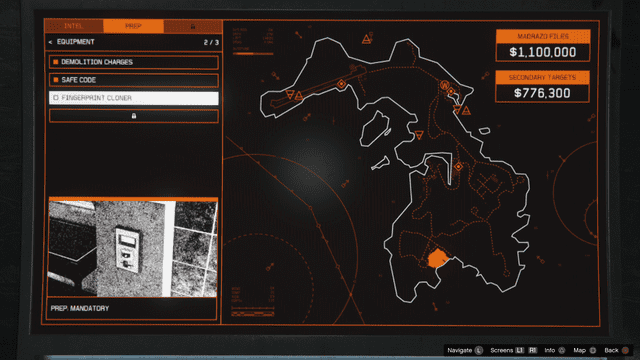
Once you have your approach vehicle, there's some equipment you need to grab to make the break-in possible. Options are available to make, but you'll need most of the items to move on to the Heist Finale.
Here are the things you need:
- Demolition Charges
- Safe Code
- Fingerprint Cloner
- Cutting Torch
Heist Prep - Equipment: Cutting Torch
Since we're showing you how to complete the Cayo Perico Heist alone, a stealthy approach is your best bet at it. So, the first item you'll need for this GTA 5 Cayo Perico Heist setup guide is the Cutting Torch.
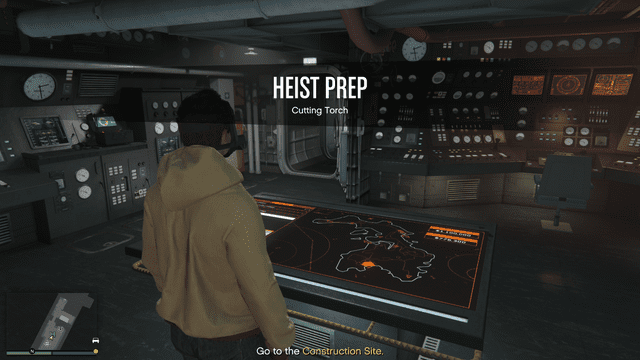
You will unlock this Heist Prep Mission after you have scouted the Drainage Grate Infiltration Spot. So make sure you have it checked out before attempting to proceed.
In the Kosatka submarine, select the mission from the Heist Prep station, then ride the Dinghy to shore and grab a vehicle. Make your way to the construction site and stand at the glowing yellow spot in the elevator to get inside the building.
From there, keep on climbing the ramps and stairs until you reach the rooftop, the Cutting Tool is there.
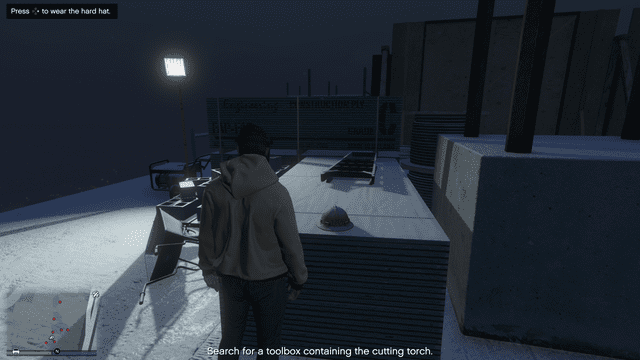
As you will head down to the area where the construction workers are patrolling, blend in by picking up a Hardhat and equipping it. This will provide a temporary disguise as long as you do not stay near the workers too long.
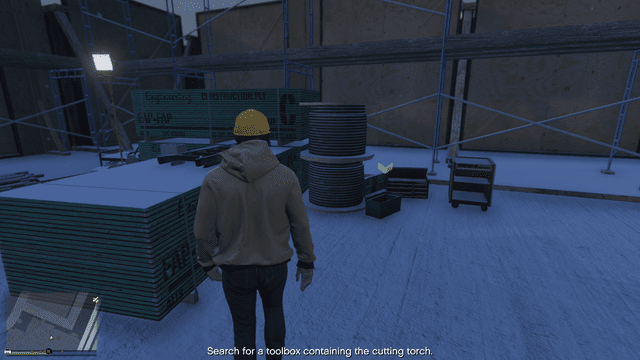
From there, go into the construction site and stay alert for toolboxes with glowing green arrows. You will find the cutting tool inside, grab it.
If enemies see you taking the tool, just use brute force. There aren't that many enemies, but most of them are heavily armed for some reason. That's not something you expect to see at a construction site. Take out hostile forces if necessary and use the elevator to return to ground level.
You can easily outrun the hostile players or NPCs with your car. Head back to the Kosatka submarine to complete the mission. You now unlock the stealthy approach to the Heist Finale.
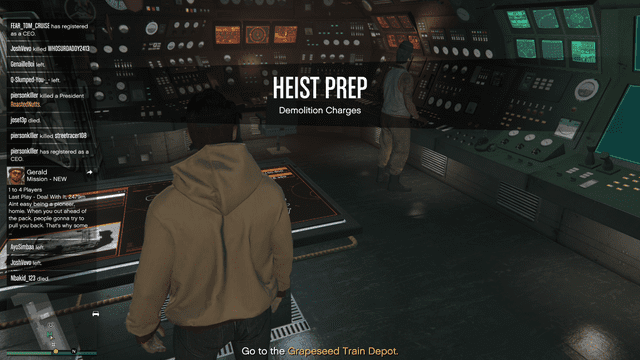
Heist Prep - Equipment: Demolition Charges
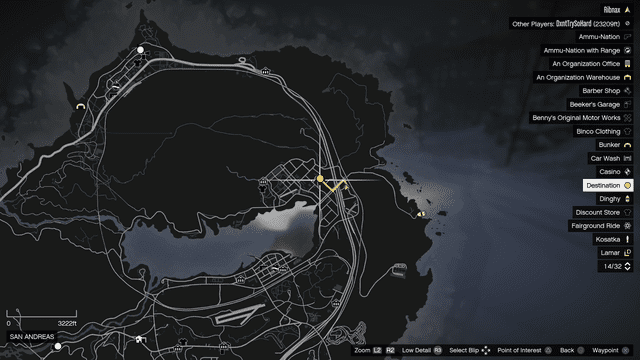
If "stealthy" is not your style, you can opt for the full-on assault instead. But you will need the Demolition Charges for this approach. In order to secure the item, select the Demolition Charges prep mission from the Kosatka menu. A waypoint will direct you to the northeastern part of Los Santos.
You will find the O’Neil Brothers in the marked area. There are nine of them in the vicinity and do expect them to put up quite a fight. So make sure you have your best body armor and heavy weapons.
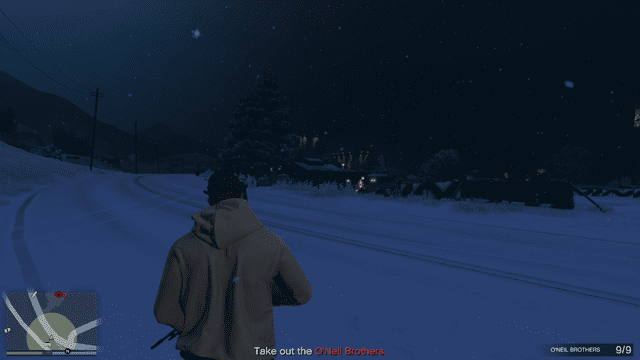
Tip: If you don’t want to risk your life over a fight with the O’Neil Brothers, then make a move first. Head to the field next to their hideout and fire a Grenade Launcher at the storage container and construction equipment. You can safely take them out without worrying about being hit with this strategy. It's not manly, but it gets the job done.

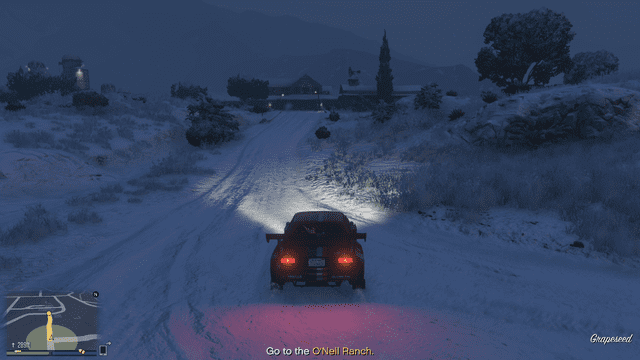
Once the O’Neil Brothers are neutralized, Pavel will inform you that the Demolition Charges aren’t there. He'll then direct you to the O’Neil home instead.
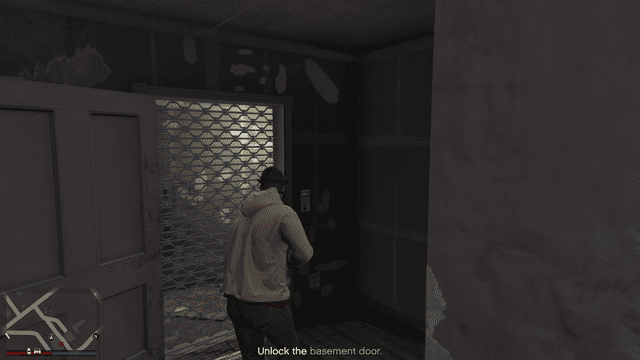
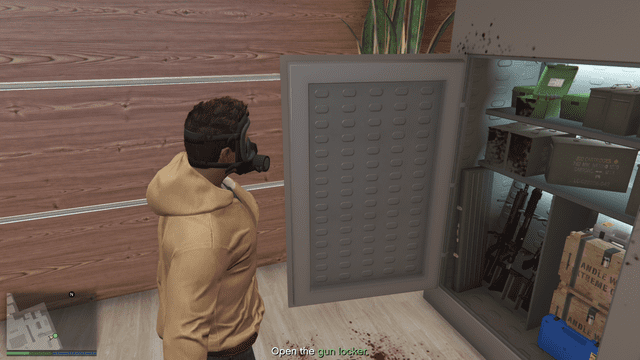
This place is heavily guarded. And you have to take them all out as you head inside. What you want to find is a security card that drops from the O'Neils. Head down to the basement to find the explosives.
Unlock the basement gate with your key. There are two guards in the basement, take them out, then carry the crate of explosives back to your car.
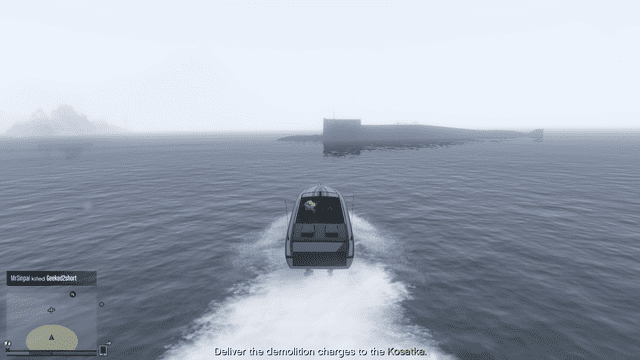
Once you have broken in, your location will be broadcast to other players on the server shortly. So it's a good idea to rush your way back to the Kosatka and complete the mission as soon as possible.
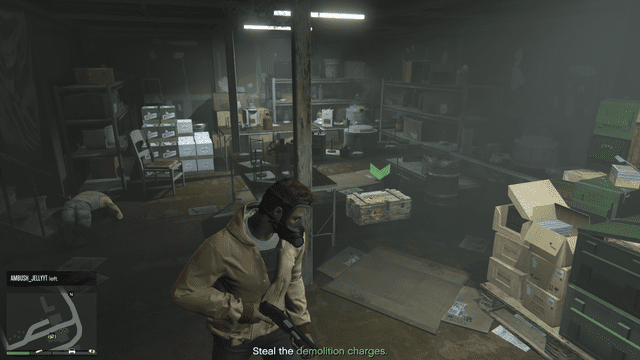
Tip: You won't have to deal with other players in Invite Only mode.
Heist Prep - Equipment: Safe Code
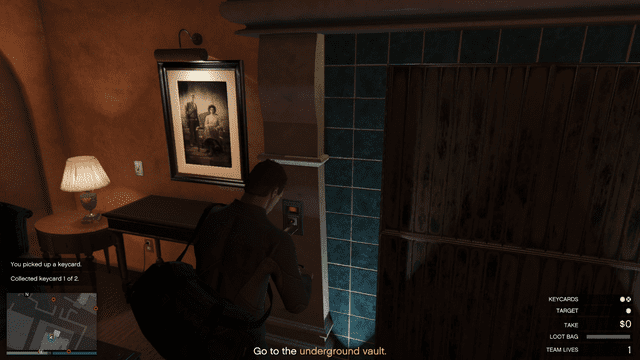
The Safe Code is a must-have in the Cayo Perico Heist Heist. It gives you access to the files Madrazo wants. Take this Heist Prep mission from the planning station in the Kosatka, then go to the Diamond Casino.

Access the elevator will initiate a cutscene that allows you to proceed to the penthouse floor. Follow the hallways until you see Apartment 512. Use a suppressed weapon to silently take out the guards and maintain the element of surprise.
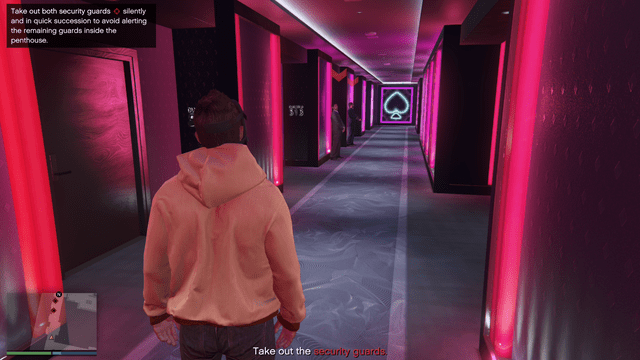
Go inside and take out all until you find the head of security. Pavel has already sent you pictures of them, check the Messages section of your phone to know what they look like.
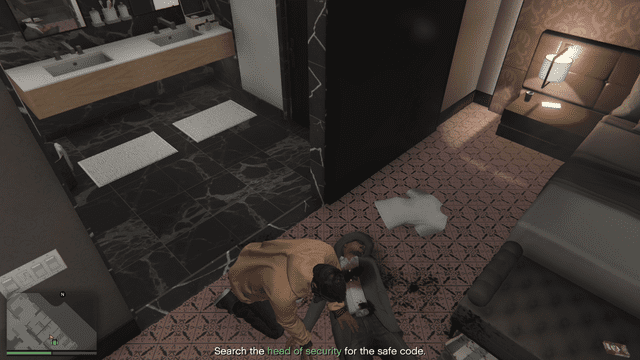
The head of security has the safe codes on them, take them out to retrieve the code. Head back to the elevators, you can either kill the guards or simply run to get out of the casino.
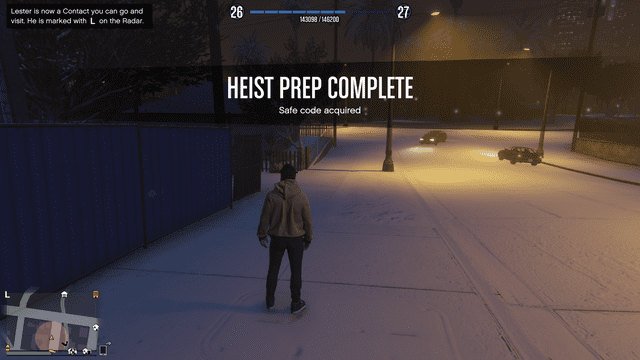
There are cops outside the vicinity. Try to escape from them or simply allow kill and you’ll complete the mission.
Heist Prep - Equipment: Fingerprint Cloner
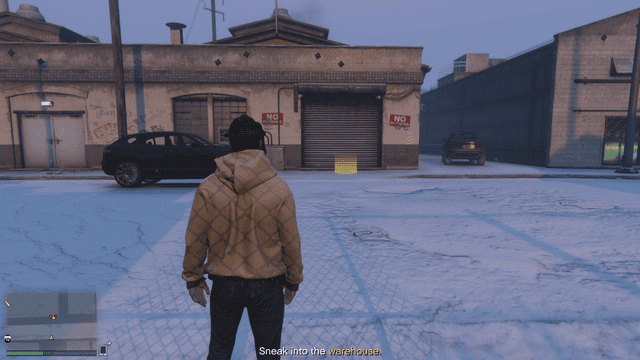
The Fingerprint Cloner is another essential item in the Cayo Perico Heist Heist. To obtain it, you have to select the Fingerprint Cloner from the Prep screen on Kosatka. Pavel will give you a waypoint in town, head there to find a yellow glowing area from which you can enter the warehouse.
There are two security cameras overlooking the entrance. If you don't want to make a scene, find the box nearby and disable the security system. However, you can just easily gun your way into the compound.
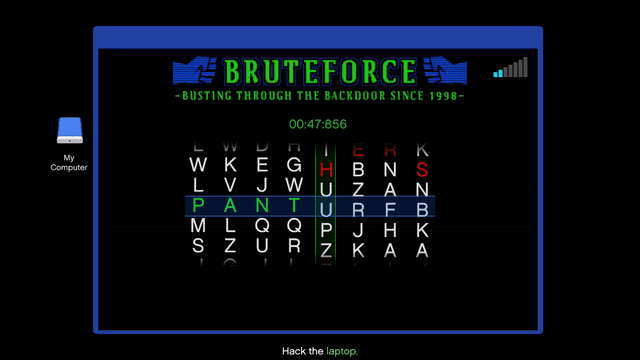
Take out the handful of guards to approach the table in the back. There's a laptop there that holds the archive location.
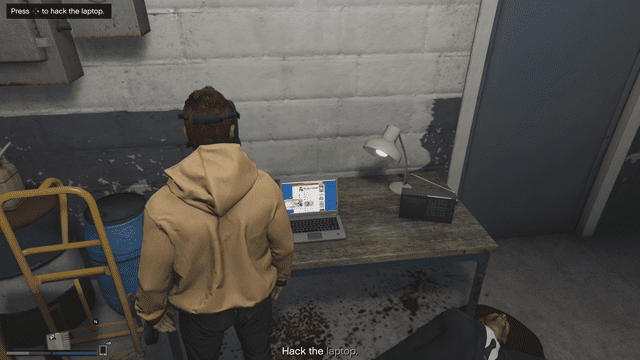
Play a hacking minigame to extract the information you need, then head back outside.
Pavel will tell you about the second location, head there next.

There are no guards in this location. Just take out the two cameras before heading inside.
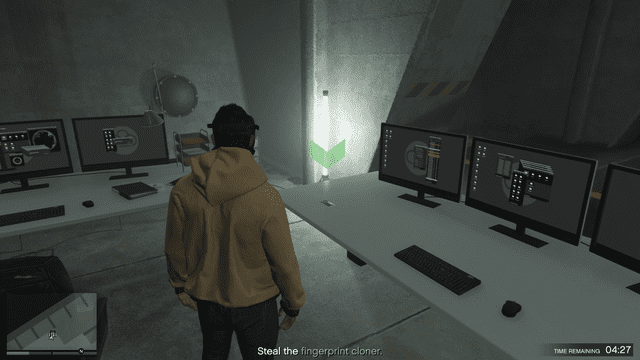
The Fingerprint Cloner is on the tables in the back, grab it and head back outside.
As soon as you get out, you’ll have a few moments before your location is sent to other players.
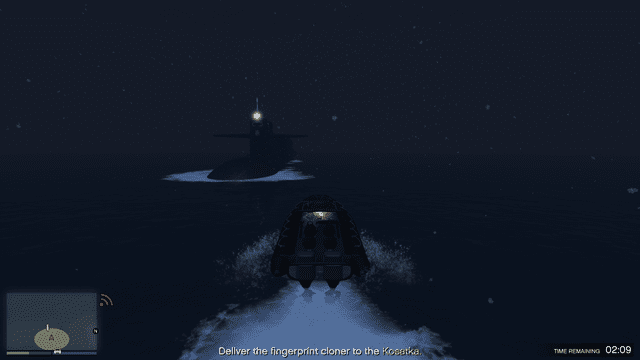
Return to the Kosatka to complete the Fingerprint Cloner prep mission.
#8 The Cayo Perico Heist Guide: Heist Prep - Weapon Loadout
Now that you have taken care of the Approach Vehicle and Equipment prep, it’s time to look at your Weapon Loadout.
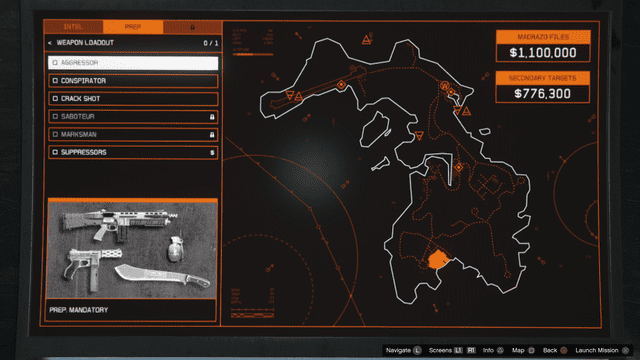
Here are some viable options
- Aggressor
- Conspirator
- Crack Shot
- Saboteur
- Marksman
- Suppressors
Heist Prep - Weapon Loadout: Conspirator
In our Cayo Perico Heist full guide today, we'll take the Conspirator Weapons Loadout. You can select it from the menu aboard the Kosatka. Head out when you're ready.
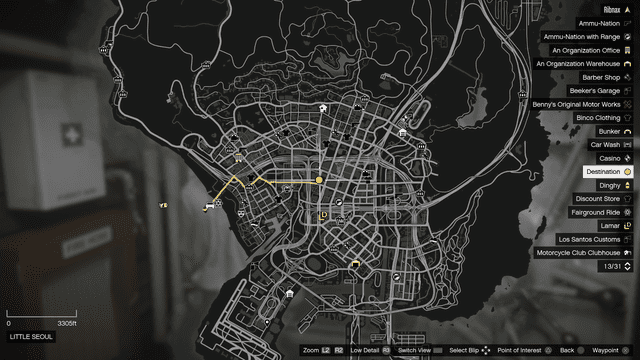
For this mission, you’ll have to go to 707 Vespucci. Make your way there and gun blazes your way through the front door, or drop in via the roof.
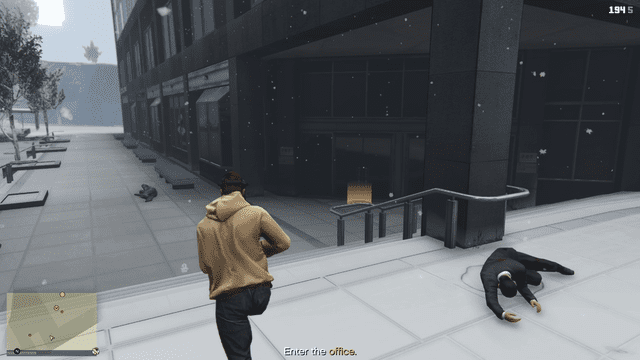
If you decide to use brute force to force your way in, take out the guards outside the office first, then head inside to reach the mission floor.
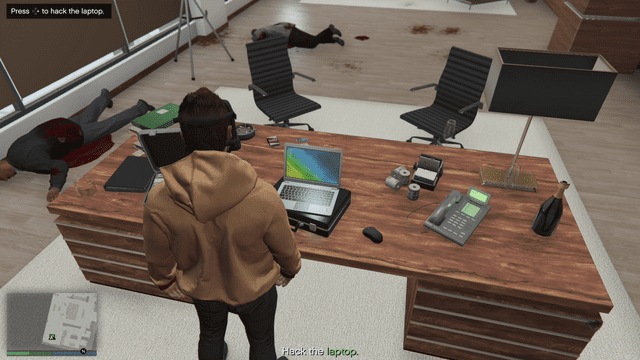
Use a Shotgun or any powerful close-range weapon to "clean" the office quickly. Go to the laptop towards the back of the office.
Play a short hacking minigame then examine the nearby wall to locate the weapons locker.
Grab the Conspirator weapon from the locker and head outside. There will be two helicopters waiting for you outside.
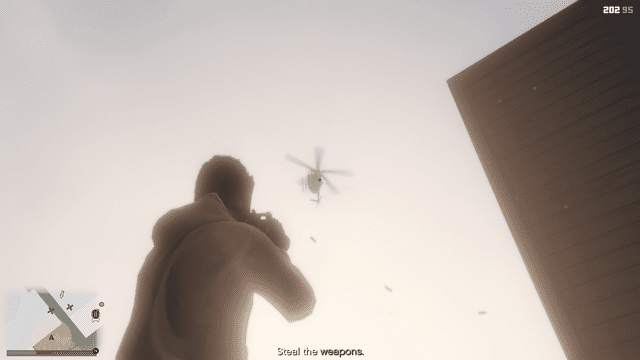
Try to take them out or outrun them back to the Kosatka. Once you complete the mission, the Heist Finale will be unlocked.
#9 The Cayo Perico Heist Guide: Heist Finale
Now that all of the Prep missions are completed, we're ready for the Heist Finale. At this point, you can select any of the missions you have prepared, and even hire a Support Crew to assist you during the mission.
However, keep in mind that the Support Crew members will not work for free. On top of that, you’ll have to take certain approaches or complete additional objectives during the Heist to make the most out of them.
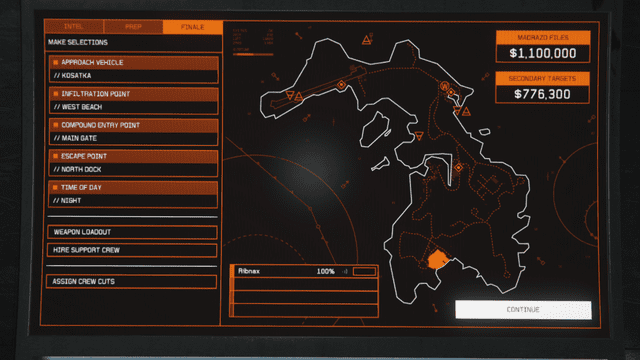
Once you have everything laid out, hit Start from the menu aboard the Kosatka to initiate the Finale.
Heist Finale - The Grate
Since we're doing the mission alone, let's go for the stealthy approach. Navigate the Kosatka submarine to approach the drainage grate. This helps us avoid most of the enemies during the Heist. And if you want to complete the mission in pure stealth, this method will minimize the risk of failure.
Swim from the Kosatka to the drainage grate, past the mines, and use the Cutting Tool you've acquired at the highlighted green points.

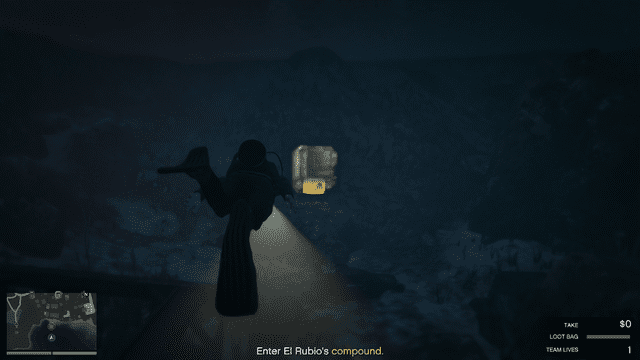
Once you have cut your way through, swim up the tunnel to enter El Rubio’s compound via the glowing yellow area.
When you get inside, you’ll be very close to El Rubio’s office. Face the ocean, turn right, head up the stairs, then turn right again.
During the Heist, watch out for patrolling enemies using your minimap. As soon as you see an opening, move to the well-lit room ahead with the dartboard. Then wait for another clearing of enemy patrols.
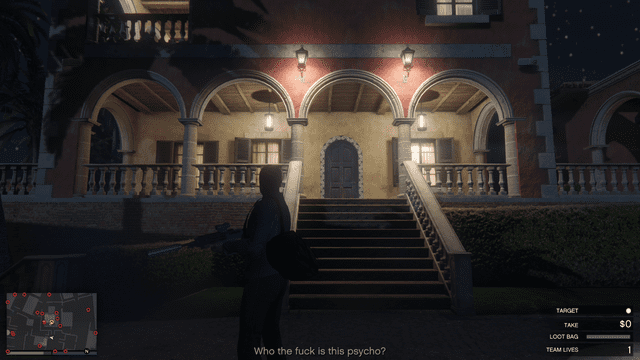
Once the path is clear, sneak your way up the stairs to the right. You should see a multi-story building on your left. That's where you want to go.
Take the staircase and head left, go around the corner, then take out the guard with a suppressed headshot. What you want to do is to maintain the stealth as you continue around the corner and up the stairs to El Rubio’s office. One of the guards should drop a gate key for us to escape.
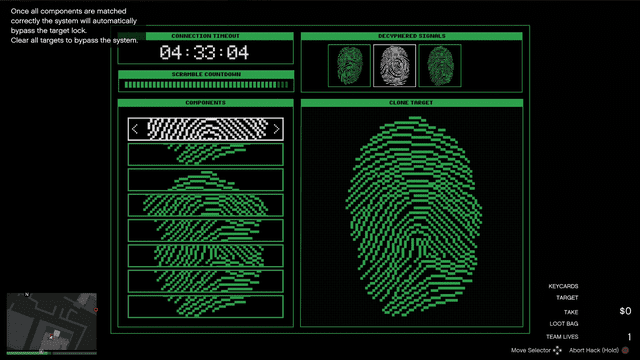
Go to the desk to pick up a key, and move to the keypad to begin hacking it.
Solve the fingerprint cloning puzzles, make the figures on the left and right match to complete it, and proceed.
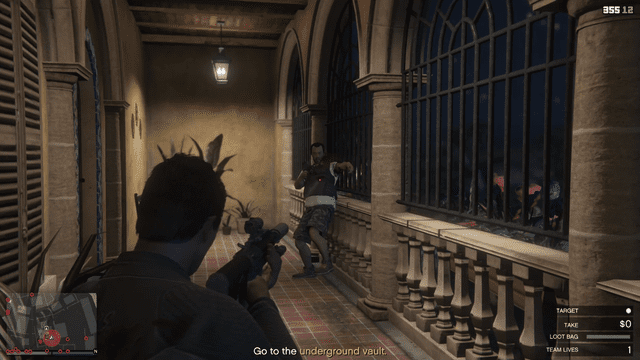
Once you’ve finished the puzzle, ride the elevator to the bottom. At the bottom, use the Cutting Tool to cut the gate, then make a turn left.
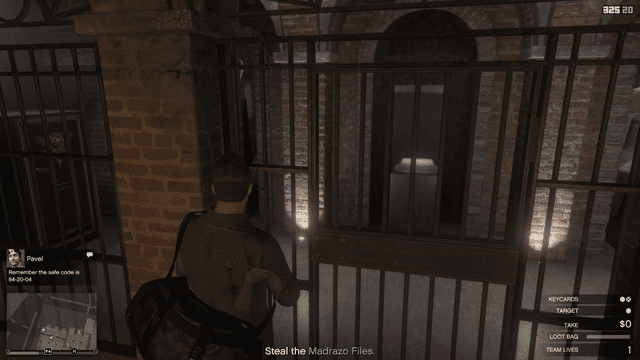
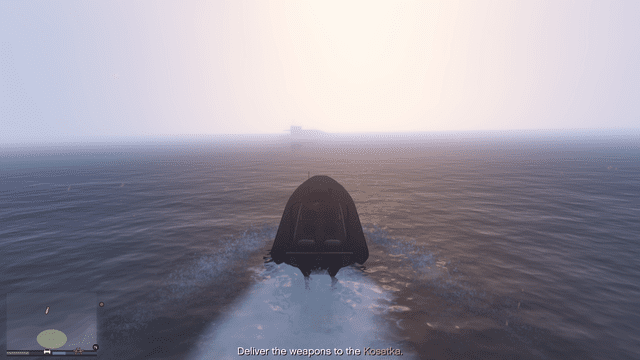
Pavel will send you the code for the safe. Use it to open it, extracting the Madrazo Files.
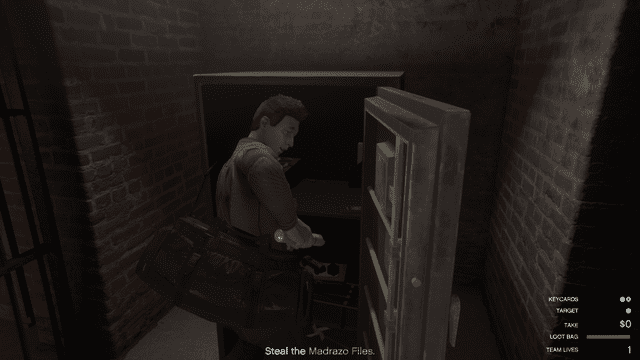
Once you’ve taken the files, head right to a gate with a key code entry gate. Use the key you got from the guard to bypass it.
Turn left and head back up to the main area. Now all you have to do is get to an exfiltration point. Move past the guards as your way in.
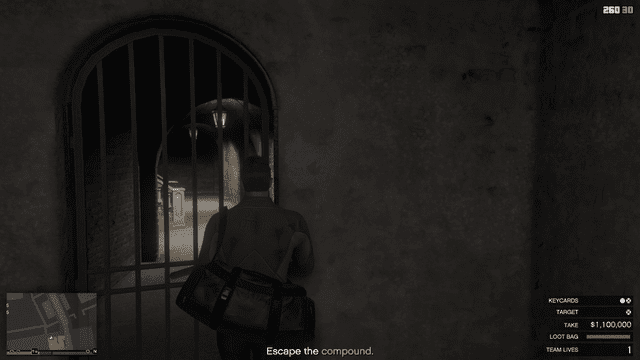
Go towards the glowing yellow spot near the gate to exit the compound. Make your way to your chosen escape point to complete the Heist and claim your reward.
That's the end of our Cayo Perico Heist Guide. If you have read all the way down here, you're the real champion! For more guides on GTA V and GTA Online, visit our website at GuruGamer.com+.


Comments